 Save to Pinterest
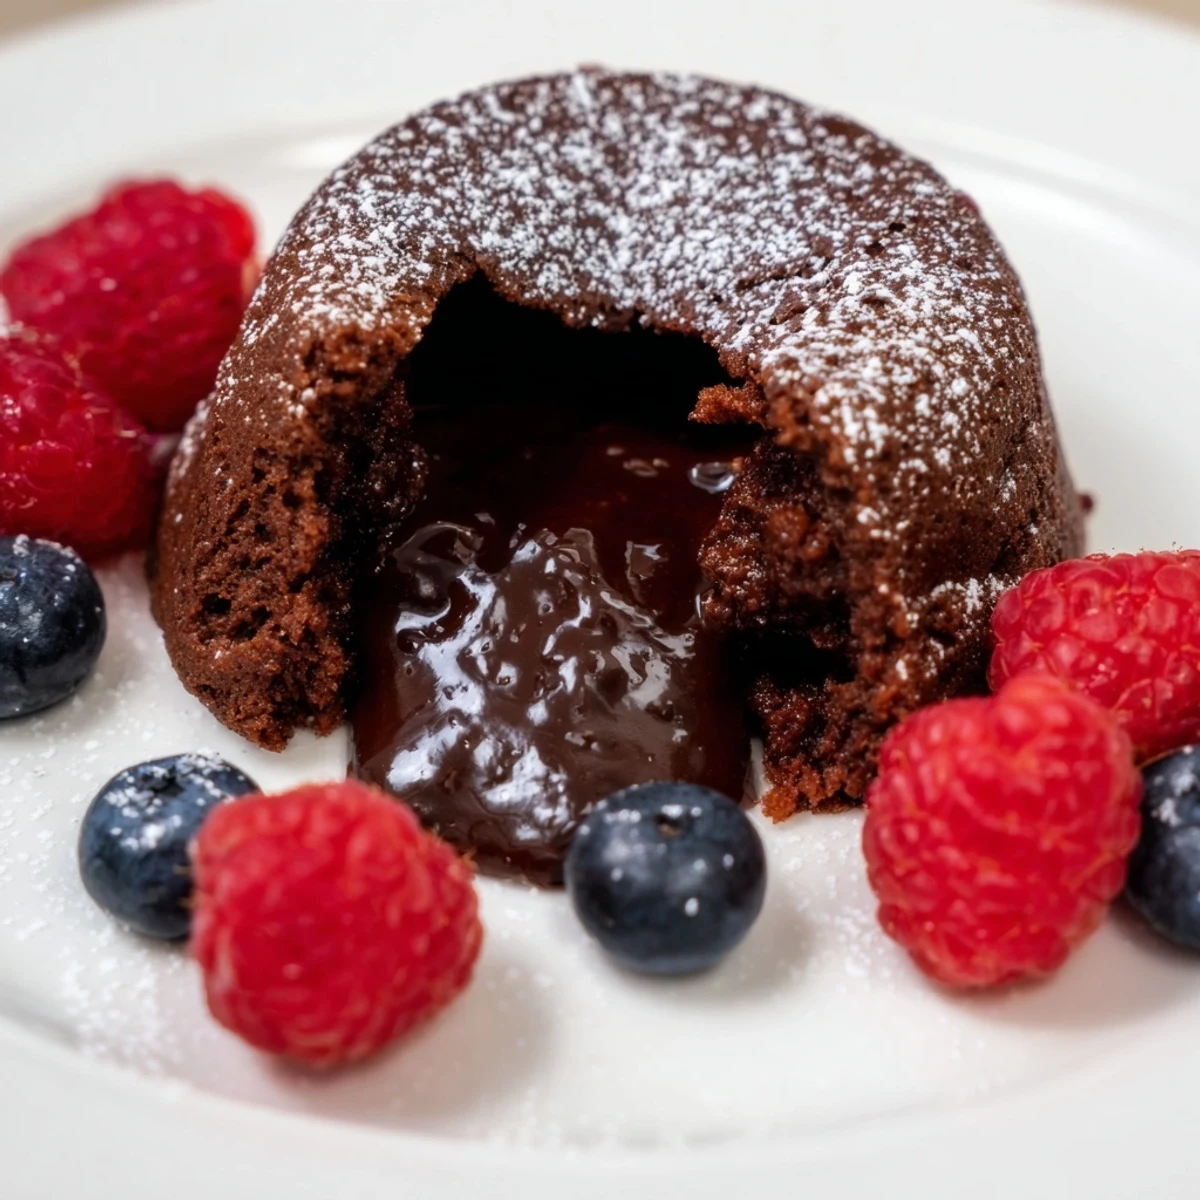
 This indulgent dessert features a warm, molten chocolate center enveloped by a tender chocolate cake shell. Combining bittersweet chocolate, butter, eggs, and a touch of sugar and flour, it bakes quickly to achieve the perfect balance of gooey and soft textures. Served with optional fresh berries and dusted with powdered sugar, it offers a restaurant-quality experience with a rich, velvety flavor.
The preparation involves melting chocolate and butter gently, mixing with eggs and sugar, folding in flour and salt, then baking in buttered ramekins until edges are set but centers remain soft. The final presentation can be enhanced with vanilla ice cream or whipped cream for added contrast.
I'll never forget the first time I tasted a molten lava cake at a small French bistro in Paris. The fork broke through that delicate chocolate shell, and the warm center pooled onto the plate like edible silk. I was mesmerized. Years later, standing in my own kitchen on a winter evening, I decided to recreate that magic. What started as nervous experimentation became something my family now requests constantly—and the best part? It's far simpler than restaurant kitchens make it seem.
I made these for my partner's birthday last spring, and watching their face light up when that golden center spilled across the plate reminded me why I love cooking. It wasn't about perfection—it was about creating a moment, a memory, something that said 'you matter to me' without words.
Ingredients
- Bittersweet chocolate (120 g, 60–70% cocoa), chopped: This is where quality truly matters—use chocolate you'd actually eat on its own. The higher cocoa percentage keeps it from being cloyingly sweet while maintaining that luxurious melt
- Unsalted butter (110 g, plus extra for greasing): Unsalted lets you control the salt level and taste the pure chocolate flavor. Use real butter, not margarine—it's essential for the tender crumb
- Granulated sugar (100 g): This aerates the eggs into a pale, fluffy foam that creates the cake's delicate structure. Don't skip the whisking time here
- All-purpose flour (30 g): Just enough to give structure without making it dense. Sifting prevents lumps that would ruin the silky texture
- Salt (pinch): A tiny amount amplifies chocolate flavor and balances sweetness—never skip it
- Large eggs (2) plus egg yolks (2): The whole eggs add structure; the extra yolks create that rich, creamy center. This ratio is the secret
- Powdered sugar, fresh berries, and vanilla ice cream or whipped cream (optional for serving): The dust of powdered sugar is traditional, but everything else is just a beautiful accompaniment to the star of the show
Instructions
- Prepare your ramekins with care:
- Preheat your oven to 220°C (425°F) and generously butter four 170 ml ramekins—and I mean generously. Dust with flour and tap out the excess. This step is non-negotiable; a poorly greased ramekin means your beautiful cake sticks and tears when you invert it
- Marry the chocolate and butter gently:
- Set a heatproof bowl over a pan of simmering water (the bottom should never touch the water). Add chopped chocolate and butter, stirring occasionally until completely smooth. The gentle heat prevents scorching. Once melted, remove from heat and let it cool for a minute or two—you don't want it so hot it scrambles the eggs
- Whisk eggs and sugar into silk:
- In another bowl, whisk eggs, egg yolks, and sugar together. Keep going for about 2 minutes until the mixture is pale, thick, and roughly triple its original volume. This aeration is essential—it's what makes the cake tender rather than dense
- Fold the chocolate in gently:
- Pour the cooled chocolate mixture into the egg foam gradually, whisking until combined. The mixture should be smooth and glossy. This is where patience pays off; don't overmix once you add the chocolate
- Add flour with a whisper, not a shout:
- Sift the flour and salt directly over the batter, then gently fold with a spatula using as few strokes as possible. Stop as soon as you don't see streaks of flour. Overmixing activates the gluten and makes the cake tough
- Fill and bake:
- Divide batter evenly among ramekins—they should be about two-thirds full. Place on a baking sheet (this makes them easier to handle) and slide into your hot oven. Set a timer for 10 to 12 minutes. The edges should look set and slightly springy; the center should still jiggle slightly when you gently shake the ramekin. This is the magic window
- Invert with confidence:
- Remove from oven and let cool just 1 minute—this allows the edges to set slightly so they don't tear. Run a thin knife around the inside edge of each ramekin, place a dessert plate on top, and in one confident motion, flip it upside down. Listen for that satisfying plop of the cake landing on the plate. If it sticks, run the knife around again and try once more
- Finish and serve immediately:
- Dust with powdered sugar, add berries if you like, top with ice cream or whipped cream, and serve right away while the center is still warm and flowing
 Save to Pinterest
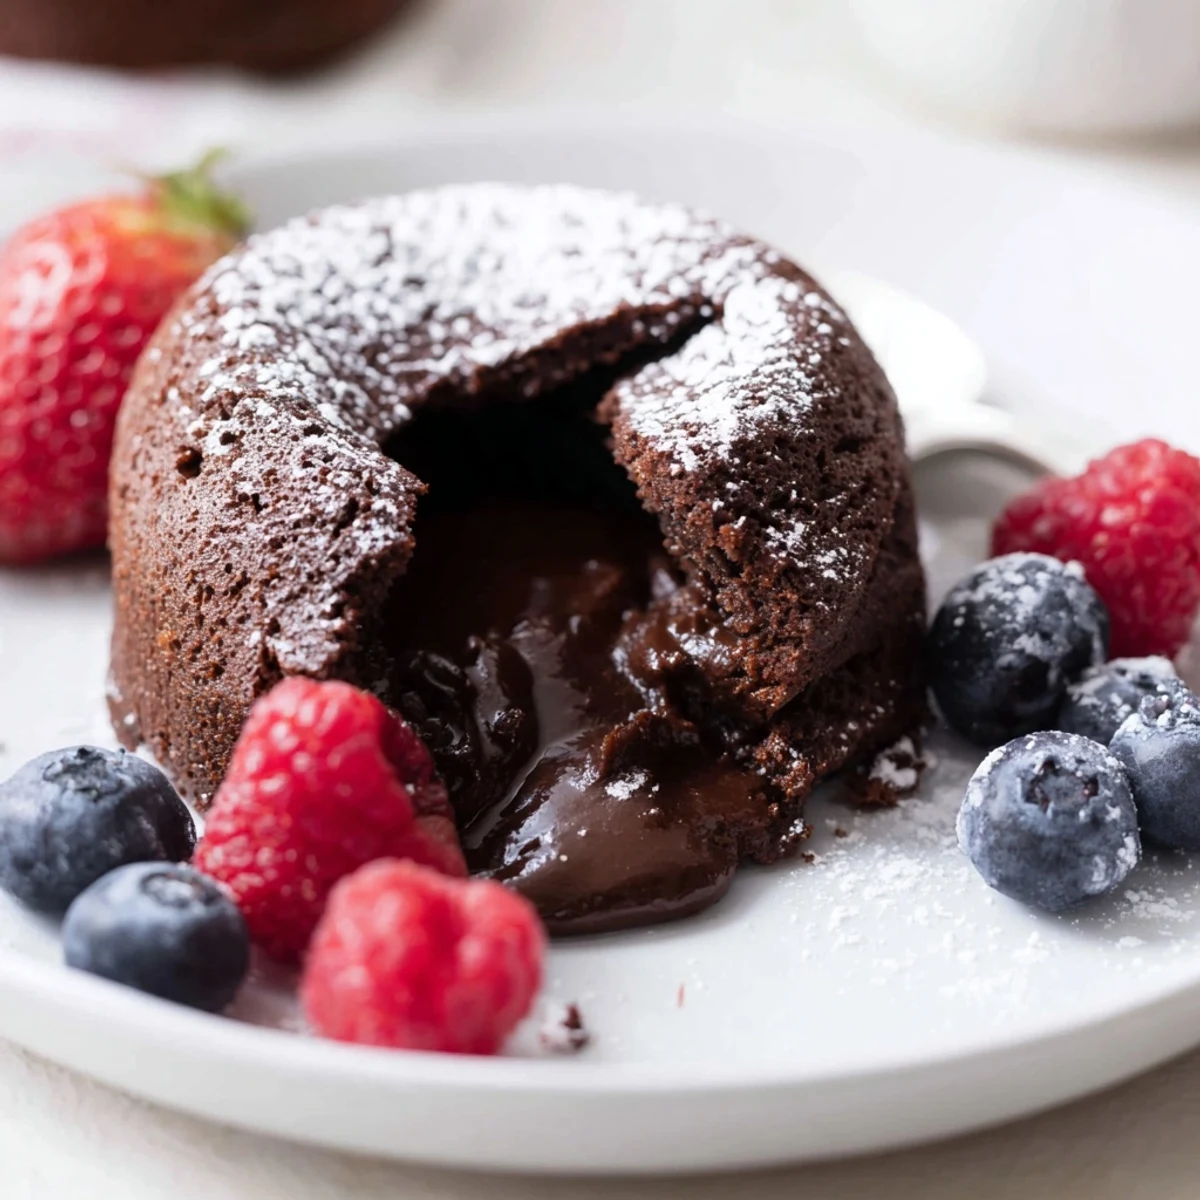
 There's something almost sacred about the moment when you invert that ramekin and watch the golden cake land perfectly on the plate, steam rising, chocolate spilling like melted treasure. It's a small victory in the kitchen that never gets old.
Make-Ahead Magic
Here's where this recipe becomes genuinely practical for entertaining: you can prepare the ramekins completely up to 1 day in advance. Cover them loosely with plastic wrap, refrigerate, and bring them to room temperature before baking. This means on the night of your dinner party, you're literally just baking for 12 minutes and plating. I often prep them during my afternoon coffee and feel like a genius when guests arrive.
Flavor Variations to Explore
Once you've mastered the classic version, these little cakes become a canvas. A pinch of instant espresso powder deepens the chocolate flavor without tasting like coffee. A tiny pinch of chili powder adds an unexpected warmth that makes people stop mid-bite and wonder what that intriguing note is. Even a whisper of cinnamon or cardamom creates something subtly different. The beauty is that you're only changing the batter, so the technique stays exactly the same.
Serving and Pairing Perfection
The true magic happens in how you finish these cakes. Powdered sugar dusting is classic, but fresh raspberries brighten the richness beautifully. A quenelle of really good vanilla ice cream creates that hot-and-cold contrast that makes dessert memorable. If you want to be particularly kind to your guests, whipped cream infused with a touch of vanilla or even a hint of Grand Marnier becomes the perfect companion.
- Make sure your ice cream is genuinely cold—it should almost hurt to eat with the warm lava cake
- If you're not confident with inverting, you can serve these in the ramekins with a spoon and let people dig into the molten center right there
- Leftover cakes (if they last that long) actually make an excellent warm brownie-like snack the next day, though honestly they're best fresh
 Save to Pinterest
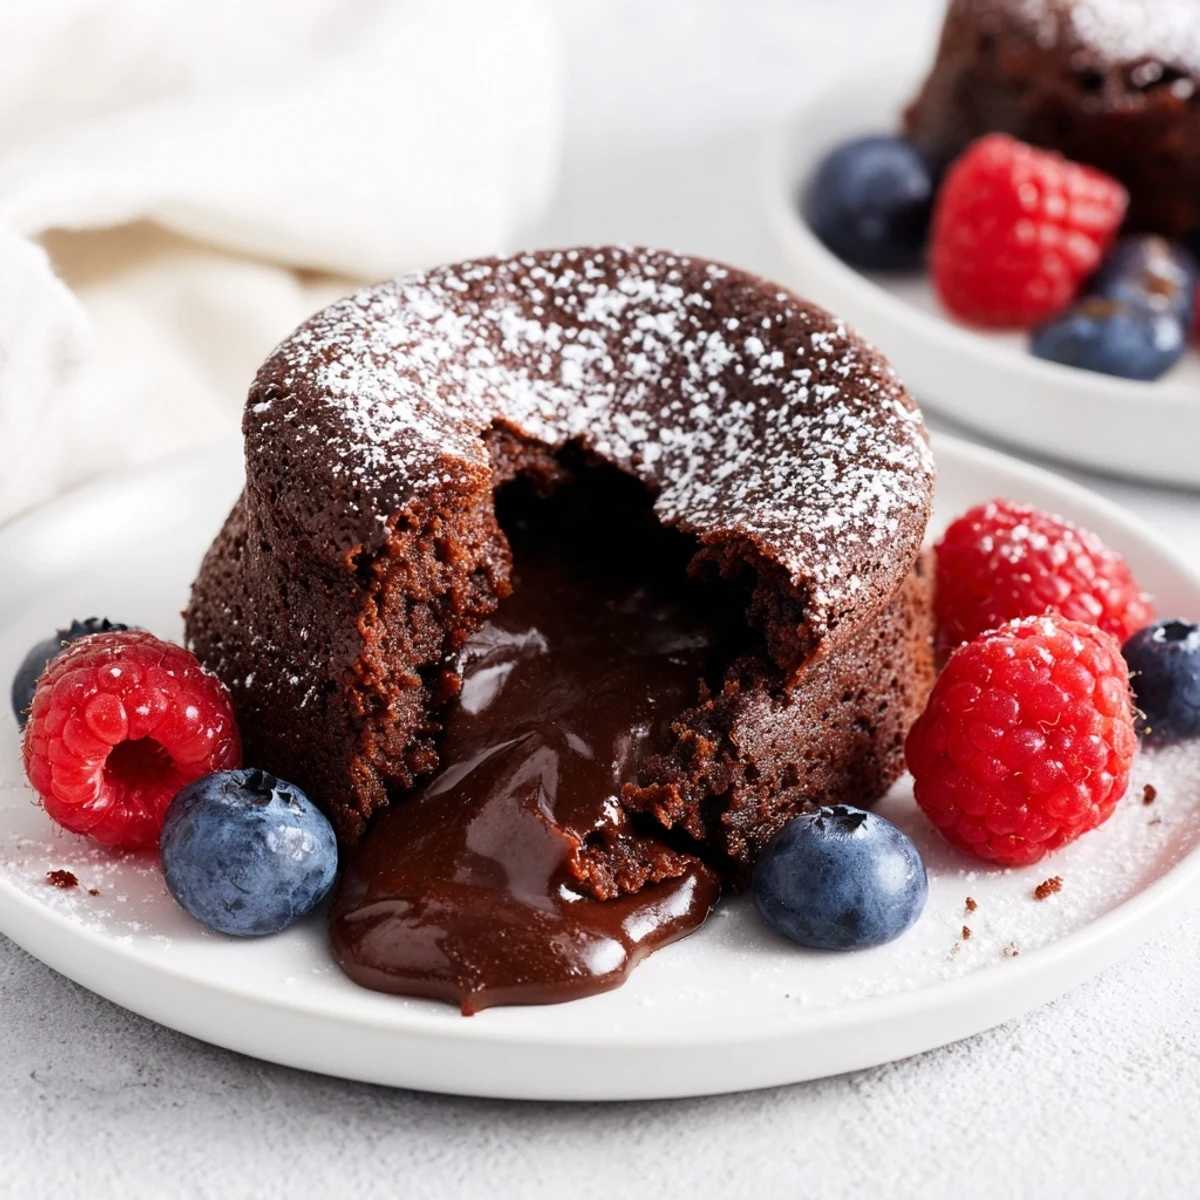
 These little chocolate cakes taught me that sometimes the most memorable things are the simplest to make—you just have to care about the details. They've become my answer to 'I want to impress someone but don't have much time,' and they've never failed me yet.
Frequently asked questions about this recipe
- → How do I achieve the molten center?
-
Bake just until the edges are set but the centers remain slightly soft. Timing is key, approximately 10-12 minutes in a hot oven.
- → What chocolate works best?
-
Use high-quality bittersweet chocolate with 60–70% cocoa for a rich and balanced flavor.
- → Can I prepare the batter in advance?
-
Yes, batter can be prepared and refrigerated up to one day before baking. Bring to room temperature prior to oven use.
- → What alternatives complement the dessert?
-
Garnish with fresh berries or dust with powdered sugar. Vanilla ice cream or whipped cream add creamy contrasts.
- → How to avoid sticking in ramekins?
-
Generously butter each ramekin and lightly dust with flour, tapping out excess to prevent sticking.
