 Save to Pinterest
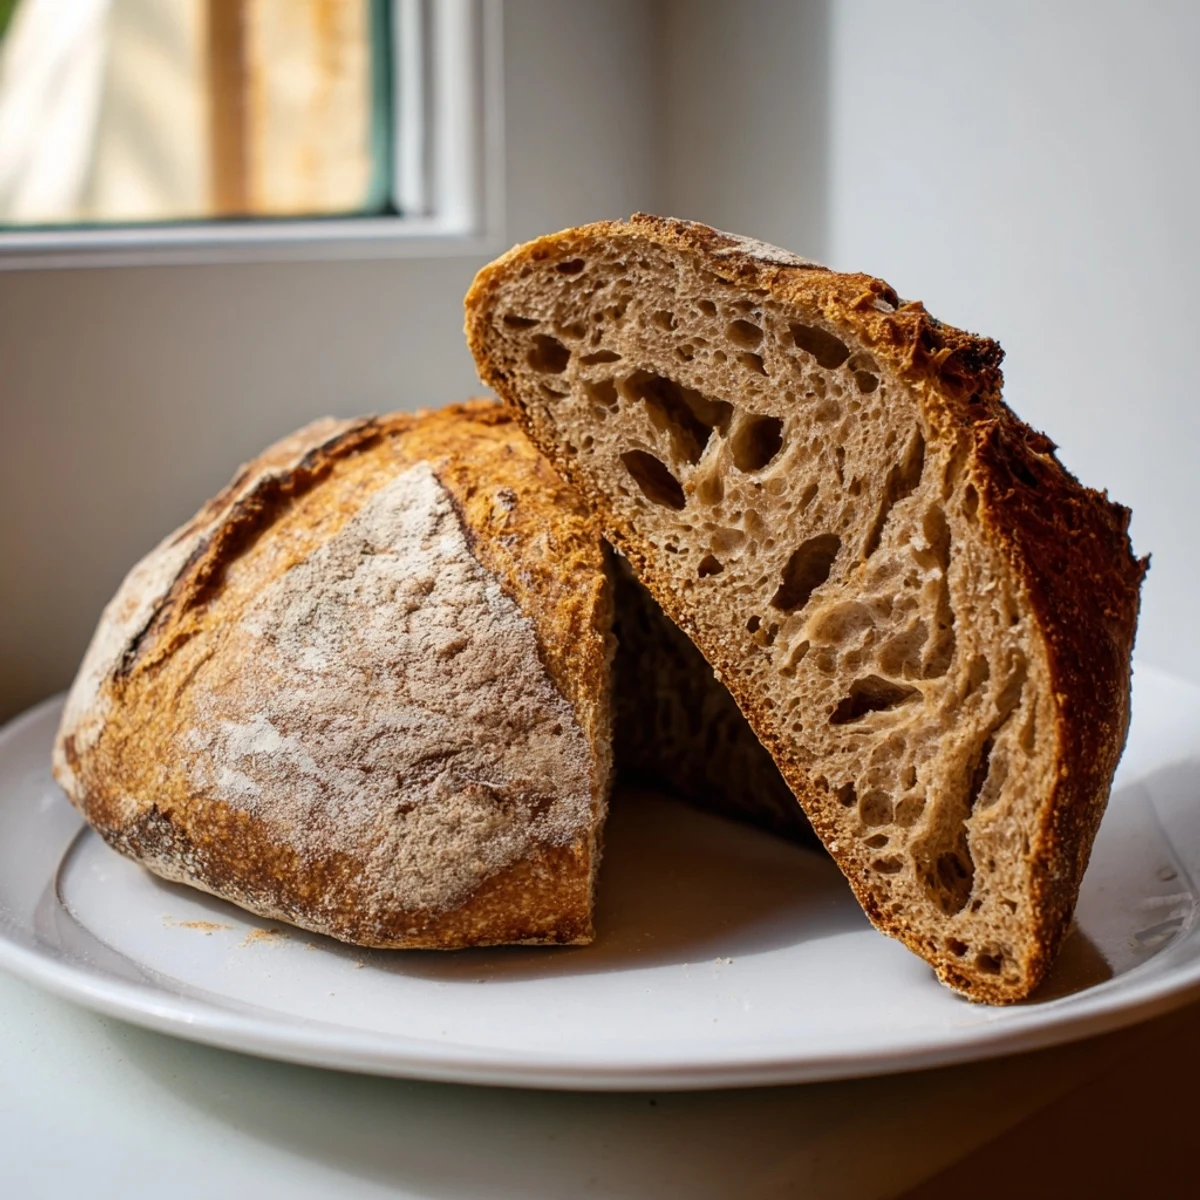
 Craft an authentic artisan loaf featuring a signature crackling crust and open, chewy interior. The wild yeast fermentation develops complex tangy notes over 14–20 hours, creating that unmistakable rustic character. Master the stretch-and-fold technique for optimal structure, then bake in a preheated Dutch oven for professional-looking results. This naturally leavened creation delivers restaurant-quality bread with minimal active effort—mostly hands-off fermentation time transforms simple ingredients into something extraordinary.
The kitchen counter was covered in a thin dusting of flour when my starter finally came back to life after weeks of neglect. I had nearly given up on it, but there it was, bubbling away with that distinctive fermented tang that signals something good is about to happen. That afternoon I made my first successful sourdough loaf, and the crackling sound as it cooled made the entire apartment smell like a proper bakery.
My neighbor knocked on the door while the bread was cooling, asking what smelled so incredible. I ended up giving her half the loaf still warm from the oven, and she texted me two hours later saying she had eaten the entire thing with just butter. Now we have a standing arrangement: I bake extra, she brings wine, and we sit on her balcony tearing through sourdough while the sun goes down.
Ingredients
- Active sourdough starter: Feed it 4-8 hours before baking until it's doubled in size and full of bubbles
- Bread flour: The higher protein content gives you that gorgeous oven spring and structure
- Whole wheat flour: Adds depth and nuttiness without overpowering the delicate tang
- Water: Room temperature helps everything incorporate smoothly and keeps fermentation on track
- Sea salt: Don't skip this or reduce it; salt controls fermentation and deepens flavor
Instructions
- Mix the autolyse:
- Combine bread flour, whole wheat flour, and water in a large bowl until shaggy and no dry flour remains. Cover with a damp towel and let it rest for an hour; this gives the flour time to hydrate and makes kneading so much easier.
- Incorporate starter and salt:
- Add your bubbly starter and sea salt to the bowl, then squeeze and fold the dough by hand until everything is evenly distributed. The dough might feel a bit stiff, but trust the process.
- Bulk fermentation:
- Cover the bowl and let it rest at room temperature for 4 to 5 hours, doing a stretch and fold every 30 to 45 minutes. Grab one edge of the dough, pull it up high, and fold it over the center, rotating the bowl four times.
- Pre-shape and rest:
- Turn the dough onto a lightly floured surface and gently shape it into a round. Cover it with your bowl and let it relax for 20 minutes while you prepare your proofing basket with plenty of flour.
- Final shape:
- Cinch the dough tight, creating surface tension across the top, and place it seam side up in your proofing basket. Dust generously with flour so it doesn't stick during proofing.
- Proof:
- Let it rise at room temperature for 2 to 3 hours until noticeably puffy, or tuck it in the fridge overnight for deeper flavor and easier scoring. The cold proof is my secret weapon for that professional bakery look.
- Preheat your oven:
- Put a Dutch oven inside and crank the heat to 480°F for at least 30 minutes. You want that pot screaming hot to create the steam that gives sourdough its blistered crust.
- Score and bake:
- Invert the dough onto parchment, score with a swift confident motion, then transfer carefully into the hot pot. Cover and bake for 20 minutes, then remove the lid and reduce heat to 430°F for another 25 minutes until deeply golden.
- Cool completely:
- Let the loaf cool on a wire rack for at least an hour before slicing. Cutting into warm bread turns the crumb gummy, and you have worked too hard to ruin it now.
 Save to Pinterest
 The first time I successfully baked sourdough, I sat at the kitchen table just staring at it for ten minutes. When I finally cut into it, the sound was like breaking glass, and the steam curling off the warm bread carried that unmistakable fermented aroma. That loaf was gone in 24 hours, and I have never looked back.
Understanding Your Starter
A healthy starter should smell pleasantly tangy and double in size within 4 to 6 hours of feeding. If it smells like alcohol or has a layer of liquid on top, it needs more frequent feedings to build strength. Keep it on the counter for daily baking or tuck it in the fridge and feed weekly.
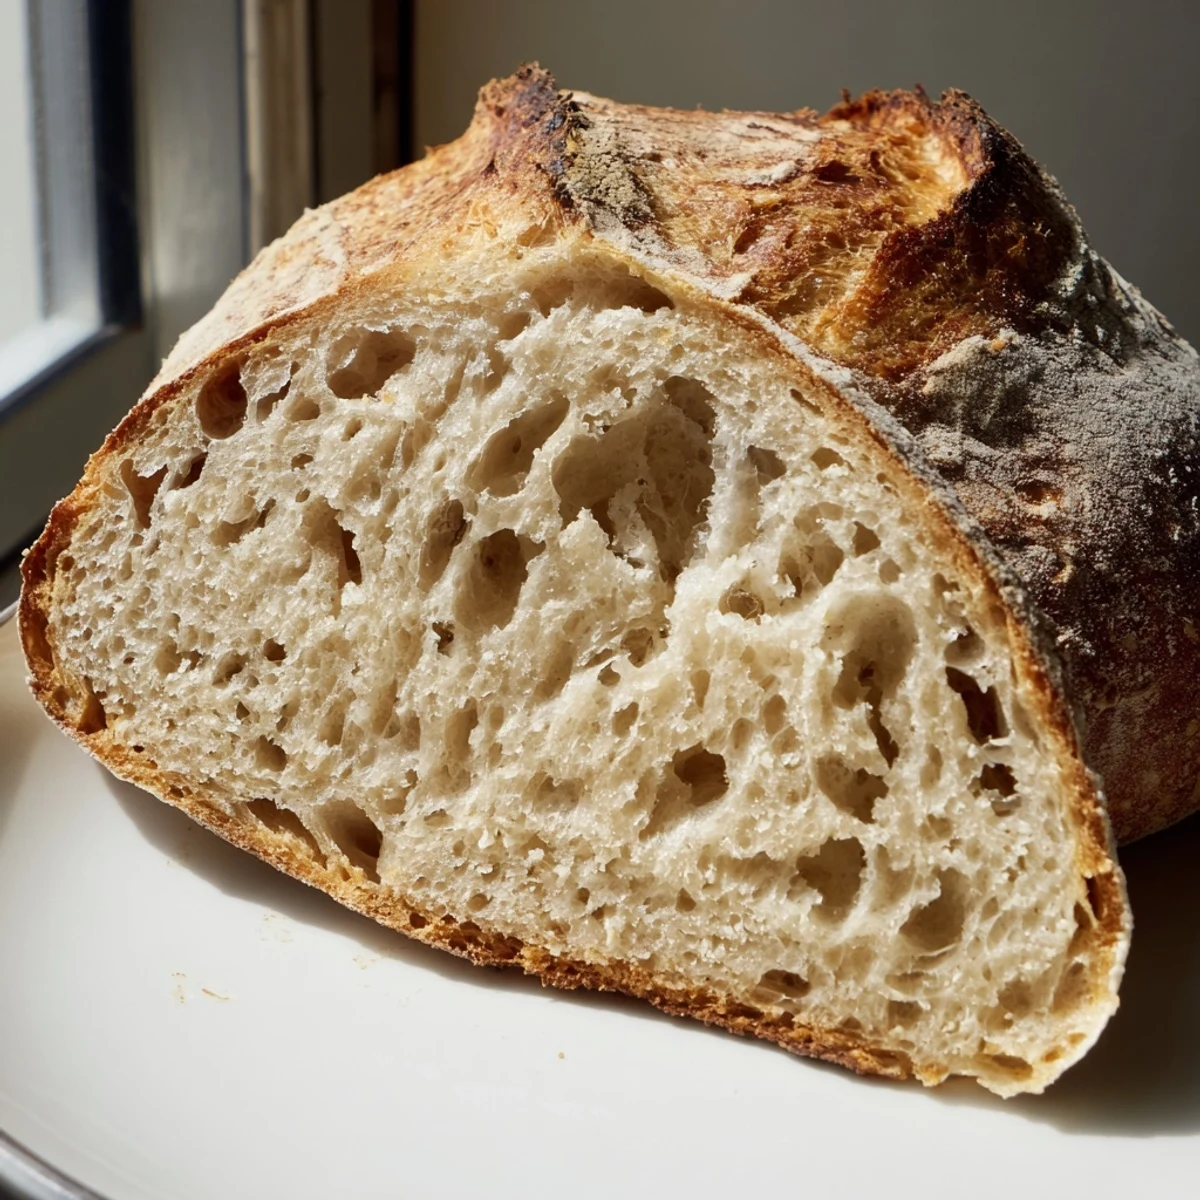
The Art of Scoring
Your blade needs to be razor sharp; I use a fresh razor blade for each bake. Score quickly and confidently, about half an inch deep, following the natural curve of the dough. Beautiful scoring is not just decoration; it guides where the bread expands in the oven.
Storage and Refreshing
Sourdough keeps remarkably well wrapped in a cloth bag for up to three days, actually improving in flavor as it sits. Stale sourdough makes incredible croutons, breadcrumbs, or the base for bread pudding.
- Revive a day old loaf with a quick splash of water and 10 minutes in a 350°F oven
- Slice extra loaves before freezing and toast straight from the freezer
- Never store sourdough in plastic unless you want a soft, sad crust
 Save to Pinterest
 There is something profoundly satisfying about transforming three simple ingredients into bread that tastes like it came from a centuries old bakery. Grab some flour, feed your starter, and enjoy the beautiful, slow process.
Frequently asked questions about this recipe
- → What makes the crust so crispy?
-
Baking in a preheated Dutch oven traps steam, creating the perfect environment for crackling crust development. The covered first 20 minutes allows interior expansion, while uncovered finishing browns and crisps the exterior beautifully.
- → Can I skip the overnight proof?
-
Yes, proof at room temperature for 2–3 hours instead. However, cold fermentation develops deeper flavor complexity and makes handling easier due to the firm, chilled texture.
- → How do I know my starter is ready?
-
Your starter should bubble actively within 4–8 hours after feeding, float in water, and have a pleasant tangy aroma. Look for doubled volume and plenty of surface bubbles before mixing.
- → Why stretch and fold instead of kneading?
-
Gentle stretching and folding builds gluten strength without destroying delicate fermentation gases. This technique creates the open, airy crumb structure that artisan bread is famous for.
- → What if I don't have a Dutch oven?
-
Any heavy oven-safe pot with a tight-fitting lid works. Alternatively, bake on a preheated baking stone and create steam by placing a metal pan of ice cubes on the lower rack.
- → How should I store leftovers?
-
Wrap in cloth or store paper bag at room temperature for 2–3 days. For longer storage, slice and freeze. Avoid plastic—the crust needs to breathe to maintain texture.
