 Save to Pinterest
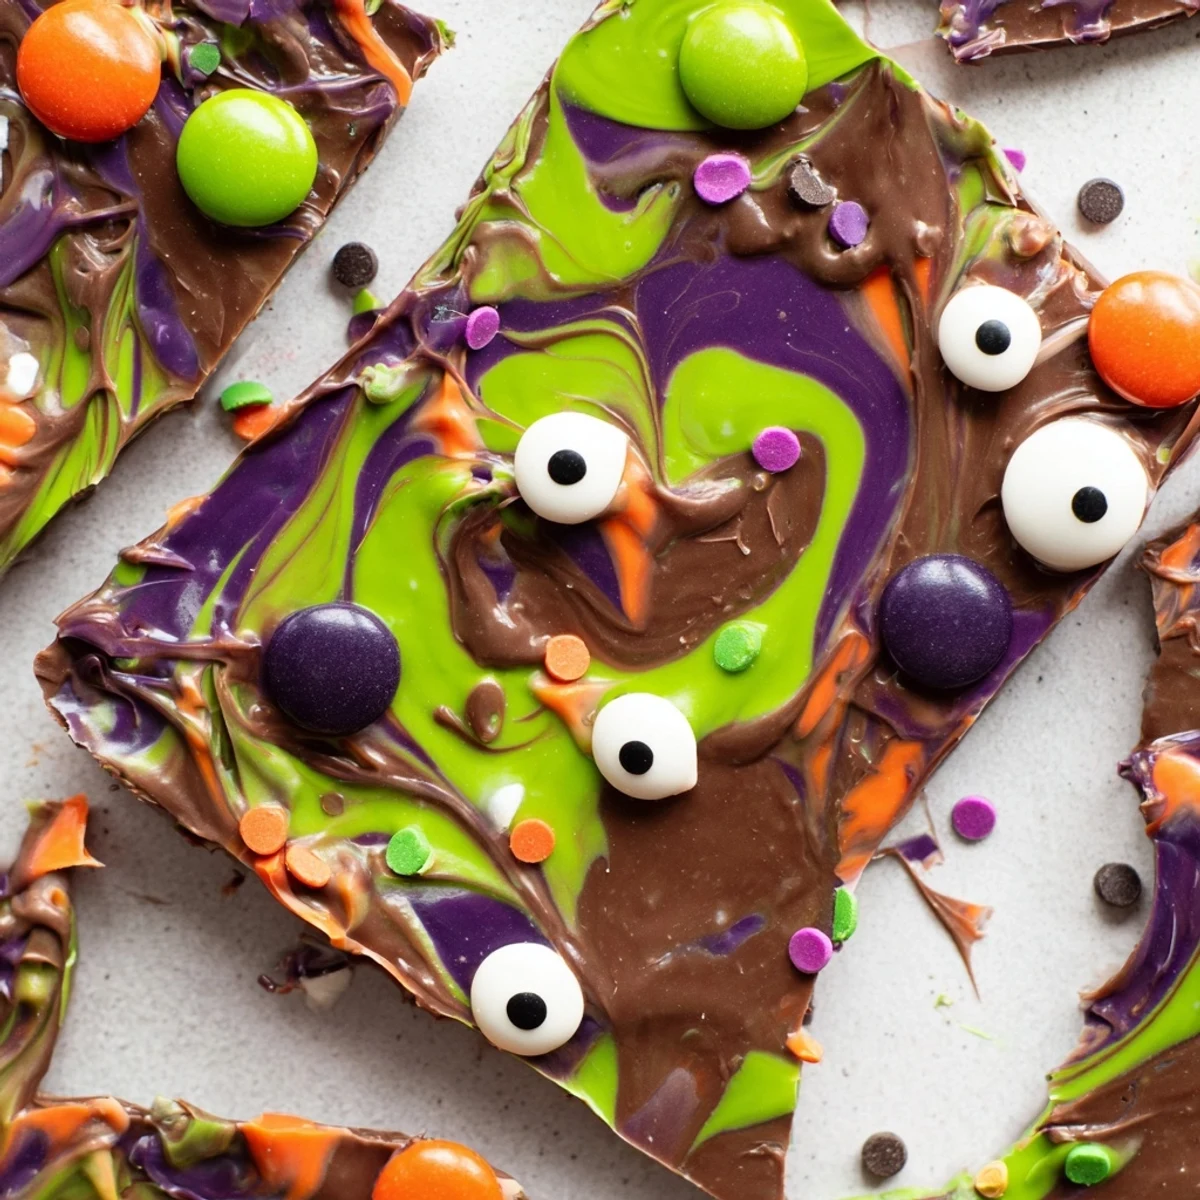
 This festive Halloween treat combines melted semisweet and white chocolate with vibrant candy melt swirls. The marbled chocolate base gets topped with candy-coated chocolates, googly candy eyes, and seasonal sprinkles for a playful presentation. Perfect for parties or gifting, this bark sets quickly at room temperature and breaks into shareable pieces. The decorating possibilities are endless—switch up the candy colors or add pretzel sticks for extra crunch.
The kitchen counter looked like a candy explosion had gone beautifully wrong. My daughter had decided we needed something 'appropriately spooky' for her class party, and somehow I'd agreed to let her take charge of the decorations. Those candy eyes stared up at me from the mixing bowl, somehow both adorable and slightly unsettling all at once.
Last year I made three batches because my coworkers kept wandering by my desk and 'accidentally' breaking off pieces. Someone finally admitted they'd started timing their afternoon coffee breaks for when I usually restocked the treat table. Now I just accept that this bark disappears faster than ghosts at dawn.
Ingredients
- 2 cups semisweet chocolate chips: This creates the rich dark base that balances the sweet toppings. I've learned that buying quality chips makes a noticeable difference in how smoothly they melt.
- 1 cup white chocolate chips: The contrast against the dark chocolate is what gives this bark its dramatic appearance. Melt these gently since white chocolate can seize up more easily than dark.
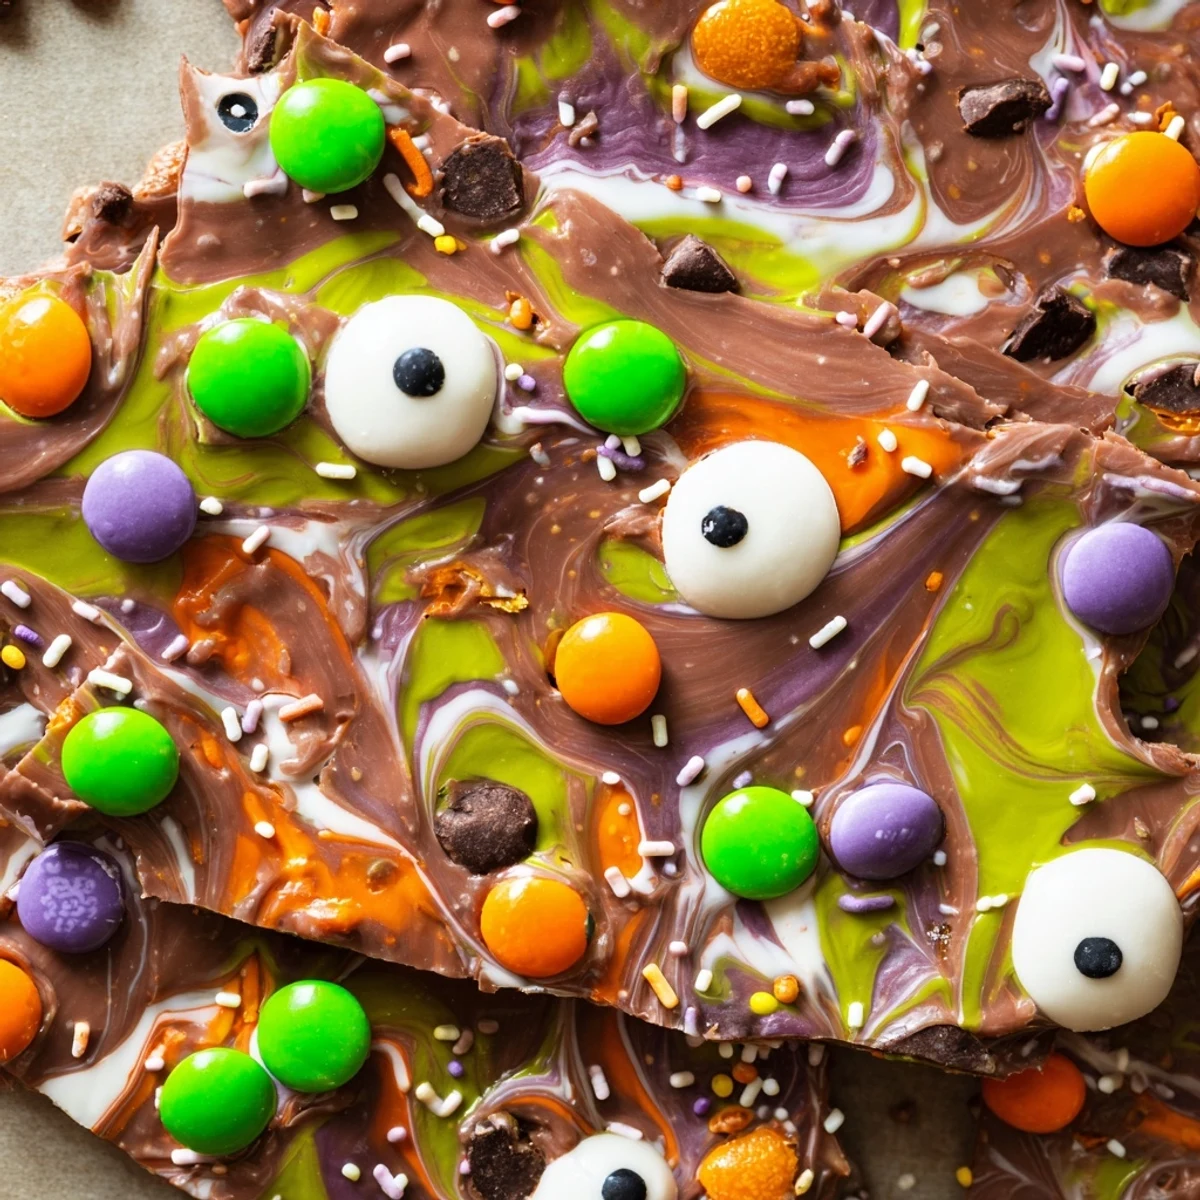
- 1/2 cup colorful candy melts: These are your magical swirl ingredients. The green, orange, and purple colors transform simple chocolate into something that looks like it came from a witch's cauldron.
- 1/2 cup mini candy-coated chocolates: These add little bursts of color and crunch throughout the bark. The small size works better than regular candies since they distribute more evenly.
- 1/4 cup candy eyes: Absolutely essential for the spooky effect. I buy extra because somehow half of them mysteriously disappear during the decorating process.
- 1/4 cup Halloween sprinkles: These catch the light and make everything feel festive. Bat and ghost shapes are particularly charming.
Instructions
- Prepare your canvas:
- Line a baking sheet with parchment paper, making sure it extends slightly up the sides. This prevents any chocolate from escaping and makes cleanup completely effortless.
- Create the dark foundation:
- Melt the semisweet chocolate chips in a microwave-safe bowl, heating in 30-second intervals and stirring between each. The chocolate should be glossy and completely smooth before you spread it about 1/4 inch thick on your prepared sheet.
- Prepare the colorful magic:
- Melt the white chocolate and candy melts in separate bowls, using 20-second intervals this time since white chocolate needs more gentle handling. You want them fluid but not hot.
- Swirl like a sorcerer:
- Drop spoonfuls of the white and colored chocolates randomly over your dark base, then drag a toothpick through the puddles to create marbled patterns. Don't overthink it, the messier the swirl, the more mystical it looks.
- Add the creature features:
- Immediately scatter the candy-coated chocolates, candy eyes, and sprinkles over the warm surface. Work quickly because once that chocolate starts setting, nothing will stick.
- Let it rest:
- Let the bark set at room temperature for about 30 minutes, or if you're impatient like me, pop it in the refrigerator for 10 to 15 minutes. The chocolate is ready when it makes a sharp sound when you tap it.
- Break into bewitching pieces:
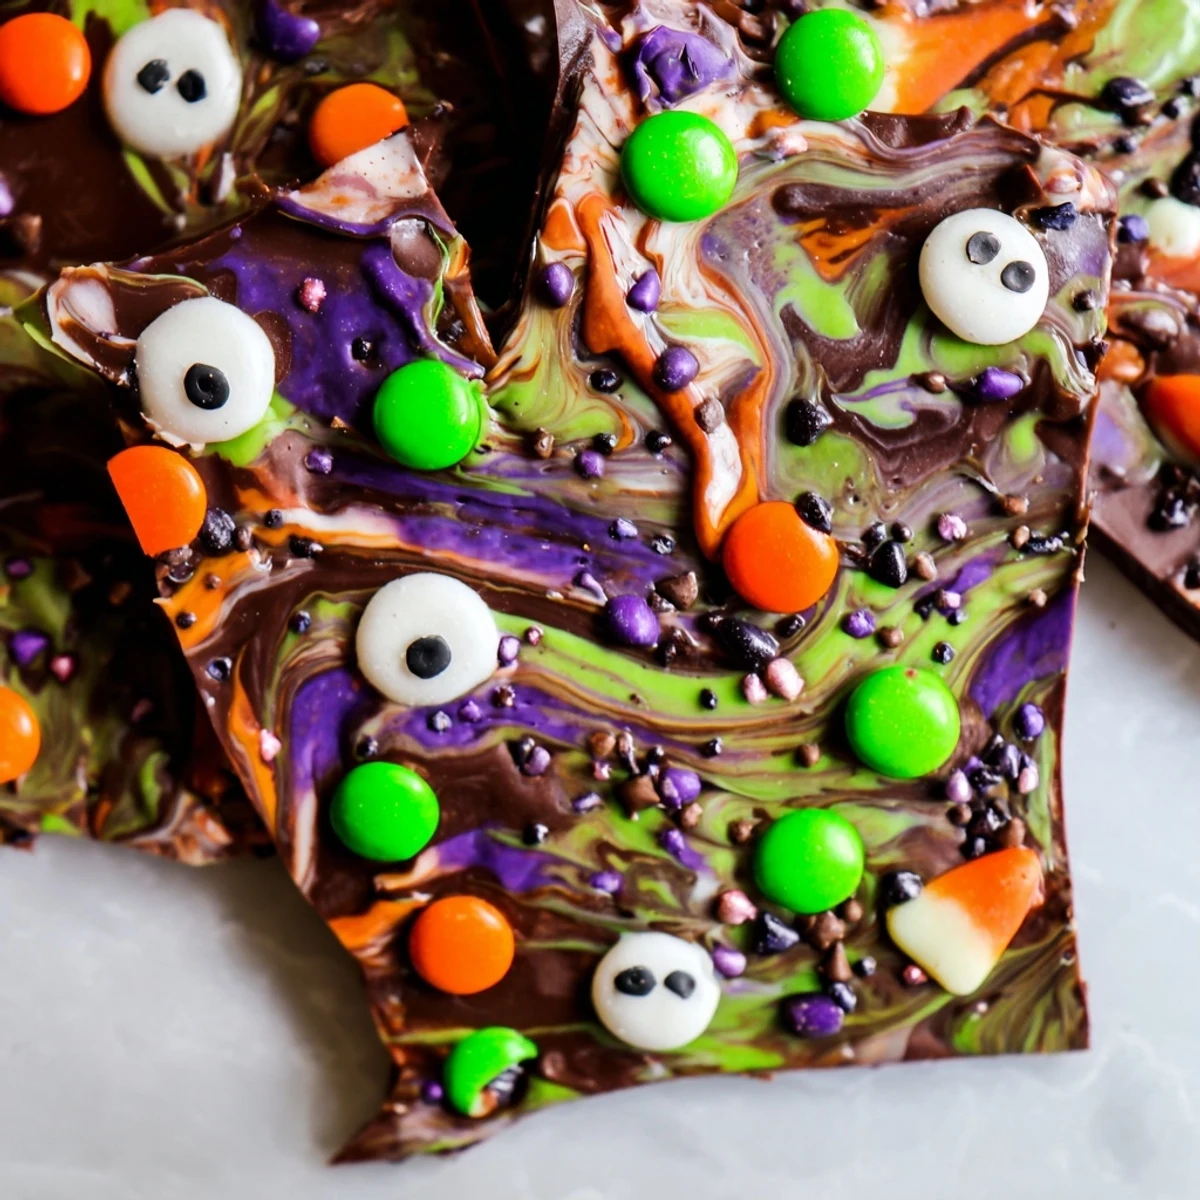
- Use your hands to snap the bark into irregular shards. The rough edges actually look more rustic and appealing than perfectly straight cuts would.
 Save to Pinterest
 My niece now requests this for every family gathering, regardless of the holiday. She swears the candy eyes follow her around the room, which I've decided not to question. Some Halloween magic is best left unexplained.
Making It Your Own
I've discovered that this recipe welcomes experimentation like an old friend. The basic technique remains exactly the same, but you can transform the entire character by switching up your color palette and decorations. Pastel melts with flower sprinkles create a beautiful spring version, while red and green with crushed candy canes makes everyone think of Christmas mornings.
The Art of Swirling
After making approximately twenty batches of various chocolate barks, I've learned that the marble effect is actually quite forgiving. The secret is not overworking the chocolate, just a few confident passes with your toothpick or skewer. Some of my most beautiful pieces came from when I accidentally dragged the swirl tool too far in one direction and had to creatively compensate. Those mistakes often look the most artistic.
Storage and Gifting
This bark keeps remarkably well at cool room temperature, stored in an airtight container for up to a week. I've started packaging small portions in clear cellophane bags tied with orange ribbon, and they've become my go-to hostess gift throughout October. People seem genuinely delighted when they realize you made it yourself rather than buying something from a store.
- Place a piece of parchment paper between layers if you need to stack the bark in your storage container
- If mailing this as a gift, pack it tightly with bubble wrap because the candy eyes can break off during shipping
- Always include a small note about ingredients, since those candy eyes contain gelatin and some people need to know that
 Save to Pinterest
 There's something deeply satisfying about breaking chocolate into jagged pieces and arranging them on a platter. It feels appropriately primitive for a Halloween treat, and watching people's eyes light up when they spot the candy eyes never gets old.
Frequently asked questions about this recipe
- → How long does the bark take to set?
-
The bark sets in about 15 minutes at room temperature, or refrigerate for 10-15 minutes for faster results. Let it firm completely before breaking into pieces.
- → Can I use different types of chocolate?
-
Absolutely. Swap semisweet chocolate for milk or dark chocolate based on your preference. The white chocolate swirls work beautifully with any chocolate base.
- → How should I store the finished bark?
-
Store in an airtight container at cool room temperature for up to one week. Avoid warm areas as the chocolate may soften or melt.
- → Is this suitable for nut allergies?
-
This can be made nut-free by carefully selecting nut-free candies and chocolate. Always check individual ingredient labels to ensure safety for those with allergies.
- → What other decorations can I add?
-
Try pretzel pieces for crunch, chopped nuts if allergies permit, or seasonal themed sprinkles. Marshmallow ghosts or gummy worms also make fun Halloween additions.
- → Can I make this ahead for a party?
-
Yes, make this up to one week in advance. Store properly in an airtight container and it will stay fresh and ready for your Halloween gathering.
