 Save to Pinterest
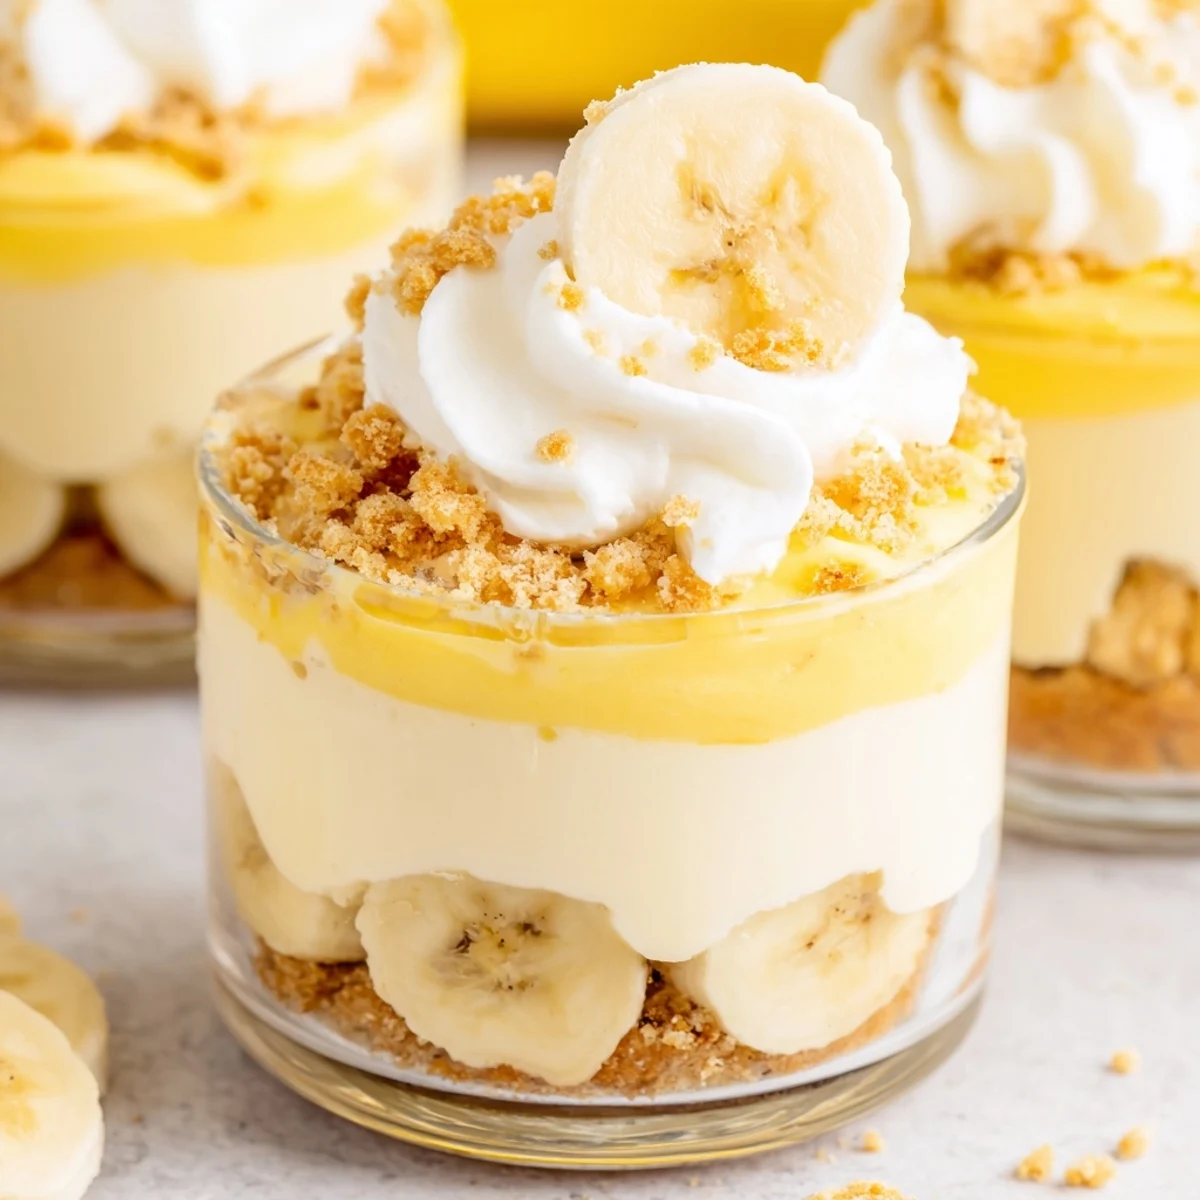
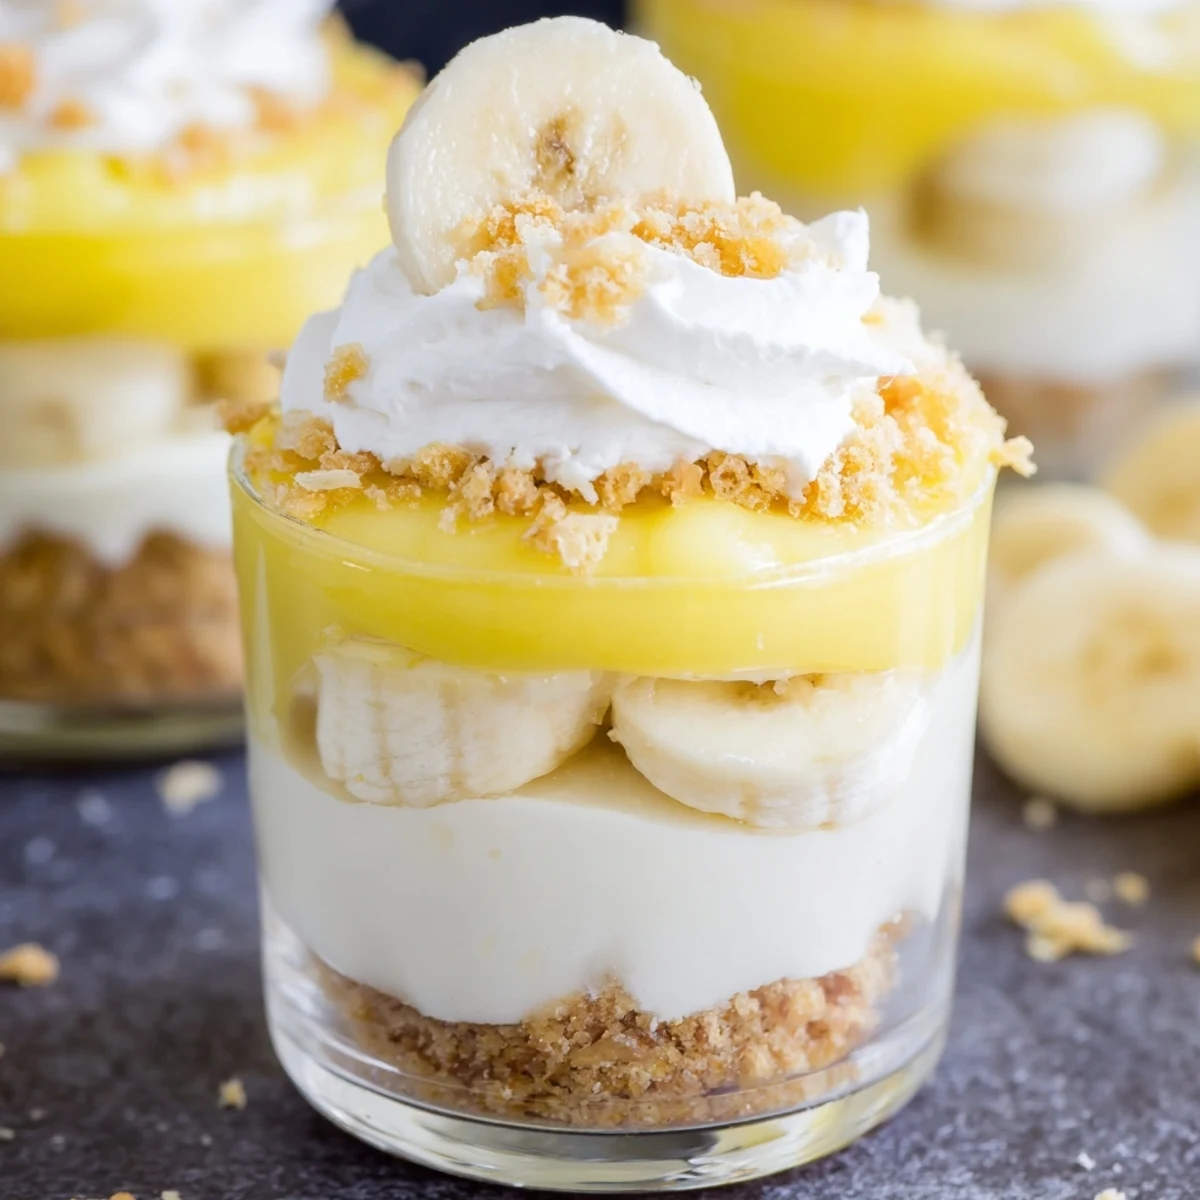
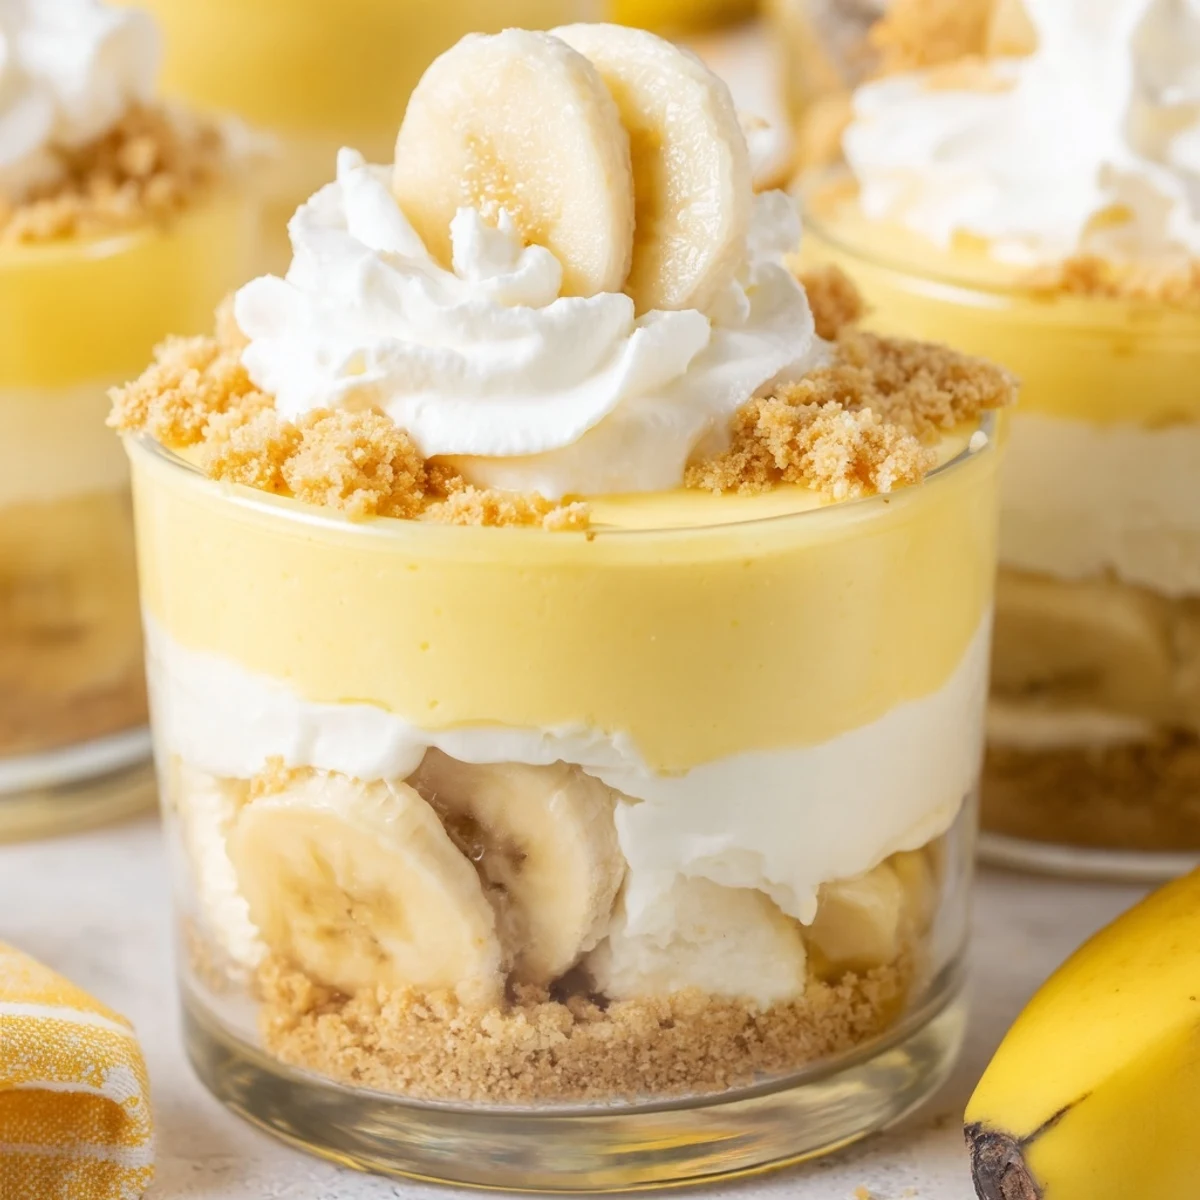
 These individual dessert cups combine the best of two classic treats—rich cheesecake and creamy banana pudding—layered in portable servings. A buttery vanilla wafer crust forms the base, followed by smooth cream cheese filling blended with whipped cream for lightness. Fresh banana slices add natural sweetness between layers, while instant banana pudding provides that signature nostalgic flavor. The entire assembly requires no oven time, just a quick chill to set. Each cup is finished with a sprinkle of crispy crumbs and more banana slices for texture contrast. Perfect for gatherings, these cups can be prepared ahead and stored until ready to serve, making entertaining effortless.
My roommate Sarah walked into our apartment last July carrying three bunches of spotted bananas she'd rescued from the markdown bin at the grocery store. She looked at me with those determined eyes that meant we were about to bake something, except it was ninety degrees and neither of us wanted to turn on the oven. That's when we started experimenting with individual portions, and these cups became the solution to our banana surplus and our collective refusal to heat up the kitchen.
Last Thanksgiving, I made these for dessert because my sister announced she was bringing her new boyfriend and I wanted something impressive but low stress. He took one bite, closed his eyes for a full ten seconds, and asked if I'd adopt him. Now they request these cups for every family gathering, and I've learned to double the recipe because people always go back for seconds.
Ingredients
- 1 cup vanilla wafer cookies, crushed: These classic cookies bring that nostalgic flavor we all remember from childhood pudding cups, and crushing them is oddly therapeutic
- 2 tbsp unsalted butter, melted: Just enough to bind the crumbs together into a cohesive crust that holds its shape when you dig in
- 8 oz (225 g) cream cheese, softened: Let this sit on the counter for a full hour because cold cream cheese creates lumps that no amount of mixing can fix
- 1/3 cup granulated sugar: This small amount sweetens the cheesecake layer without overpowering the delicate banana flavor
- 1 tsp pure vanilla extract: Don't skimp here because vanilla amplifies all the other flavors and makes everything taste more expensive
- 1 cup heavy whipping cream, cold: The colder your cream and bowl, the faster it whips into those gorgeous stiff peaks that lighten the whole dessert
- 1 (3.4 oz/96 g) package instant banana pudding mix: This creates that unmistakable banana pudding flavor we all know and love from childhood
- 1 1/4 cups cold whole milk: Whole milk makes the pudding layer richer and creamier than you'll get with lower fat options
- 2 ripe bananas, sliced: Look for bananas with plenty of brown spots because they're sweeter and have that intense banana flavor we want
- Additional vanilla wafer crumbs: For that essential crunchy texture on top that contrasts beautifully with the creamy layers below
- Fresh banana slices: These should be added right before serving so they don't turn brown and look unappetizing
- Whipped cream (optional): Because why not add another cloud of creaminess on top of an already dreamy dessert
Instructions
- Build the foundation:
- Mix the crushed vanilla wafers and melted butter in a small bowl until every crumb is coated and the mixture holds together when you squeeze it. Spoon about two tablespoons into the bottom of each serving cup and press down gently with the back of your spoon to create an even crust layer.
- Make the cheesecake base:
- Beat the softened cream cheese, sugar, and vanilla extract in a medium bowl with a hand mixer until the mixture is completely smooth with no lumps remaining. In a separate chilled bowl, whip the cold heavy cream until stiff peaks form, then gently fold it into the cream cheese mixture until fully incorporated.
- Prepare the banana pudding:
- Whisk together the instant banana pudding mix and cold milk in another bowl for about two minutes until it thickens considerably. Set this aside while you start assembling the cups, giving it time to develop that classic pudding consistency.
- Layer it all up:
- Spoon about half the cheesecake filling over the crust in each cup, spreading it gently to create an even layer. Add a single layer of fresh banana slices on top of the cheesecake, then divide the banana pudding evenly among the cups. Finish with the remaining cheesecake mixture on top of each layer.
- Add the finishing touches:
- Sprinkle each cup with additional vanilla wafer crumbs for that perfect crunch factor. Top with more fresh banana slices and a generous dollop of whipped cream if you're feeling extra indulgent.
- Chill and serve:
- Cover the cups and refrigerate for at least two hours to let all the flavors meld together and the layers set properly. These can be made up to a day in advance, though you should wait to add the final banana slices until just before serving.
 Save to Pinterest
 These became my go to contribution to dinner parties after I showed up with them to a friend's potluck and watched them disappear in under five minutes. Now people specifically request them, and I've learned that making individual portions somehow makes people feel special and attended to, like each person got their own little gift.
Making Ahead
I've learned through trial and error that you can assemble everything except the final banana slices and whipped cream up to twenty four hours in advance. The flavors actually develop and improve after a night in the fridge, so this is the perfect make ahead dessert for entertaining. Just cover each cup tightly with plastic wrap and store them on the top shelf where nothing can squish them.
Serving Suggestions
These look absolutely stunning in clear glass cups or mason jars because you can see all the beautiful layers through the sides. I like to set up a little toppings bar with extra whipped cream, crushed wafers, and even some chocolate shavings so guests can customize their own cups. It turns dessert into an interactive experience and always gets people talking.
Storage And Leftovers
If by some miracle you actually have leftovers, these will keep in the refrigerator for up to three days though the banana slices might start to brown slightly. The texture remains remarkably stable thanks to the cheesecake layer holding everything together. I've eaten them for breakfast the next morning and felt zero regret about my life choices.
- Press a piece of plastic wrap directly onto the surface of any uncovered cups to prevent a skin from forming
- The crust will soften slightly after the first day but still maintains its texture and flavor
- These actually freeze well for up to a month if you use freezer safe containers and thaw overnight in the fridge
 Save to Pinterest
 There's something deeply satisfying about layered desserts in individual cups, like each person gets their own perfectly portioned moment of indulgence. I hope these become your solution for hot days when you want something spectacular but absolutely refuse to turn on the oven.
Frequently asked questions about this recipe
- → Can I make these cups ahead of time?
-
Yes, these cups can be prepared up to 24 hours in advance. Cover and refrigerate, then add fresh banana slices and whipped topping just before serving to prevent browning.
- → How do I prevent bananas from turning brown?
-
Toss banana slices lightly in lemon juice before layering, or add them immediately before serving. The acidity helps slow oxidation and keeps fruit looking fresh.
- → Can I use homemade pudding instead of instant?
-
Absolutely. Prepare homemade banana pudding from scratch, let it cool completely, and layer as directed. The texture may be slightly denser but equally delicious.
- → What type of cups work best for serving?
-
Clear glass dessert cups, mason jars, or small parfait glasses showcase the beautiful layers. Any 6-8 ounce vessel with straight sides works perfectly.
- → Can I substitute the vanilla wafers?
-
Graham cracker crumbs, gingersnaps, or even Biscoff cookies make excellent crust alternatives. Adjust butter slightly to achieve the right crumb texture.
- → How long do these need to chill before serving?
-
Refrigerate for at least 2 hours to allow layers to set and flavors to meld. For best results, chill 3-4 hours for the cheesecake layer to firm completely.
