 Save to Pinterest
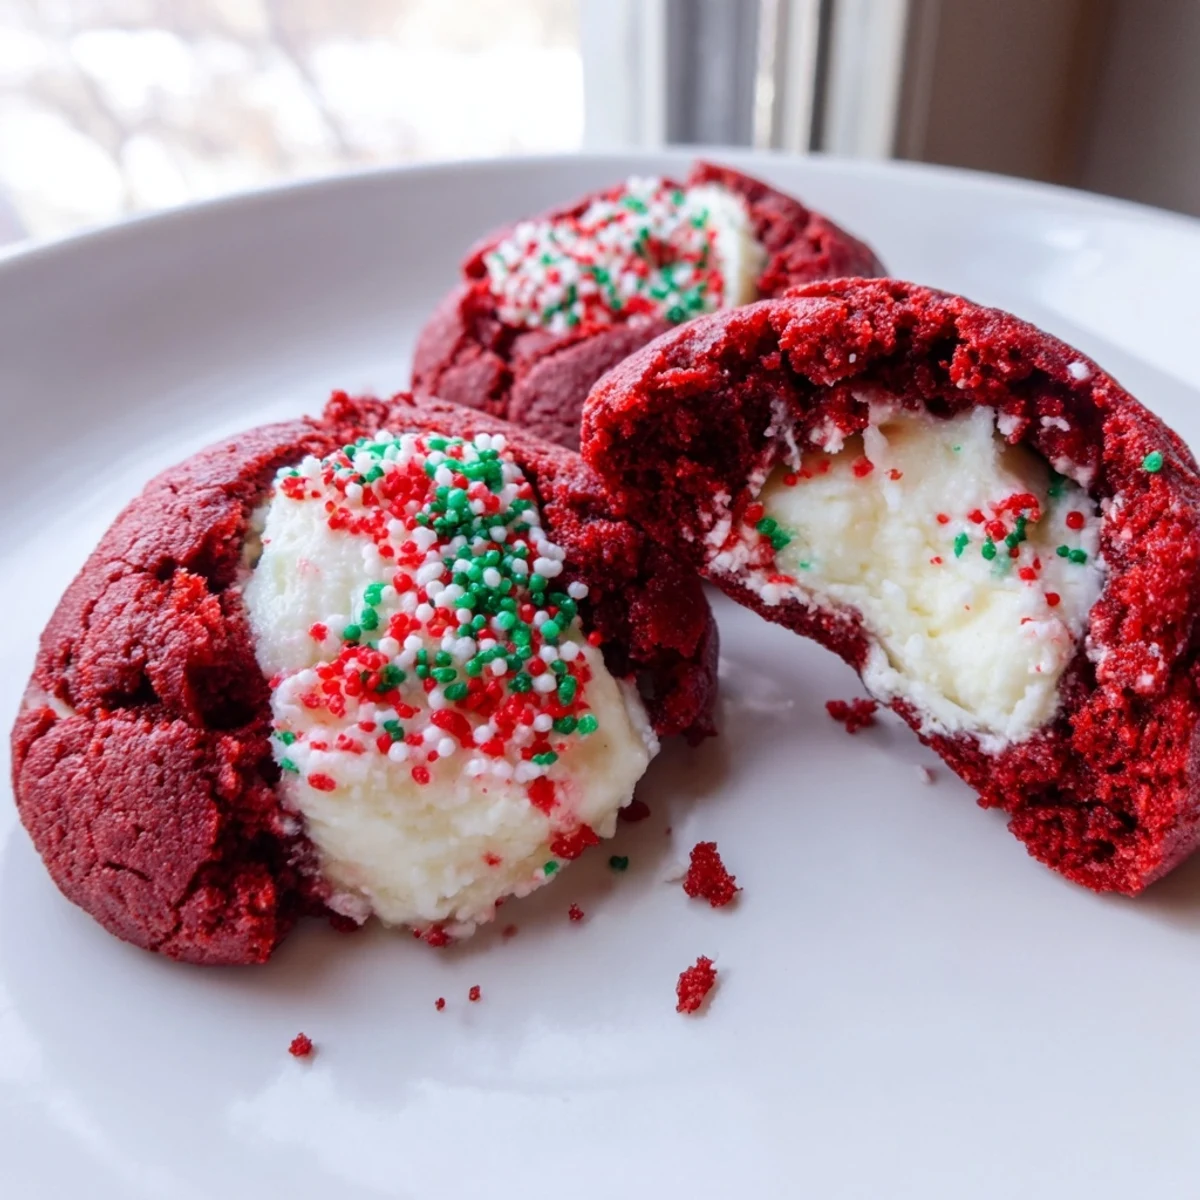
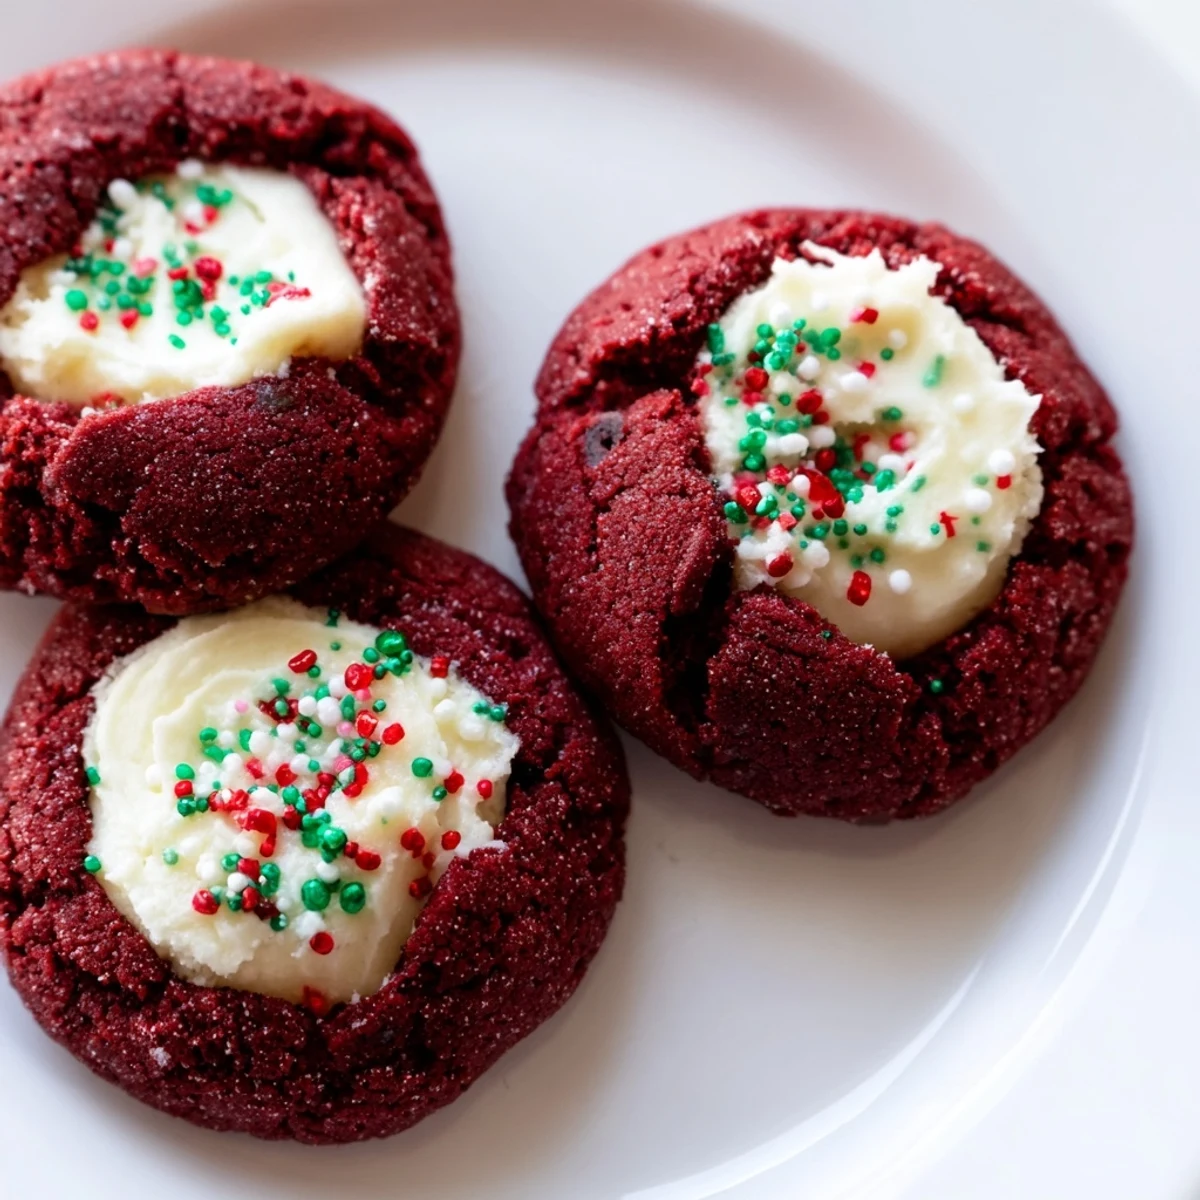
 These delightful red velvet thumbprint cookies feature a tender, cocoa-infused dough filled with smooth cream cheese centers. The vibrant red color makes them perfect for holidays and special occasions, while the rich chocolate flavor satisfies any sweet tooth. Each cookie bakes in just 12 minutes and yields 24 treats, making them ideal for gatherings or gift-giving. The cheesecake filling adds a tangy contrast to the sweet cookie base, creating a balanced flavor profile that appeals to both chocolate and cream cheese lovers.
The first time I made these cookies, my kitchen looked like a crime scene—red smudges on the counter, food coloring streaked across my palms, and my husband walked in asking if everything was okay. That vivid red velvet hue always commands attention, doesn't it? I've learned to keep a damp paper towel nearby now, but honestly, the mess is part of the charm. These little cookies have become my go-to when I want something that looks impressive but doesn't require spending all afternoon in the kitchen.
Last December, I brought a platter of these to my sister's holiday party, and I swear I watched three different people do a double-take before reaching for one. My brother-in-law, who claims he doesn't like sweets, ended up eating four of them and asking if I'd hid anything else in the filling. There's something about that red and white combination that feels festive, but honestly, I've started making them year-round just because they make people happy.
Ingredients
- All-purpose flour: This forms the structure of your cookie—too little and they'll spread too much, too much and they'll be tough
- Unsweetened cocoa powder: Don't skip this or try to swap it for hot chocolate mix—the cocoa is what gives these that sophisticated red velvet depth
- Baking soda: Just enough to help them puff slightly and hold their shape without turning into cake
- Salt: Even a tiny amount balances the sweetness and wakes up all the flavors
- Unsalted butter: Room temperature is non-negotiable here—if it's too cold, you'll overwork the dough trying to cream it
- Granulated sugar: Cream this thoroughly with the butter for that tender, melt-in-your-mouth texture
- Egg yolk: Using just the yolk adds richness without making the cookies too cakey
- Whole milk: Brings everything together and adds a little extra tenderness
- Vanilla extract: Pure vanilla makes a difference here, especially since it's paired with the cream cheese filling
- Red food coloring: Gel coloring gives you that vibrant red without adding extra liquid, but liquid works too
- Cream cheese: Full-fat and completely softened will give you the smoothest, most luscious filling
- Powdered sugar: Sweetens the filling without making it grainy—sift it if it's been sitting in your pantry for months
Instructions
- Get your oven ready:
- Preheat to 350°F and line your baking sheets with parchment—I learned the hard way that the cream cheese filling can stick, so don't skip this step
- Whisk the dry ingredients:
- Combine flour, cocoa, baking soda, and salt in a medium bowl—set this aside while you work on the wet ingredients
- Cream the butter and sugar:
- Beat them for a full 2 minutes until they're pale and fluffy, which creates those air pockets that make cookies tender
- Add the flavorings:
- Mix in the egg yolk, milk, vanilla, and red food coloring until everything's incorporated—the color will look intense, but it fades slightly during baking
- Combine everything:
- Gradually add the dry ingredients and mix just until you don't see white streaks—overmixing here makes tough cookies
- Make the filling:
- Whisk the cream cheese, powdered sugar, and vanilla in a small bowl until completely smooth and set it aside
- Shape the cookies:
- Roll the dough into 1-inch balls and space them 2 inches apart on your prepared baking sheets
- Create the thumbprints:
- Press your thumb or the back of a teaspoon into each ball—don't go too deep or the filling might overflow during baking
- Fill the centers:
- Spoon about half a teaspoon of cream cheese filling into each indentation, being careful not to overfill
- Bake to perfection:
- Pop them in for 11 to 13 minutes—the edges should look set while the centers still seem slightly soft
- Cool completely:
- Let them rest on the baking sheet for 5 minutes before moving them to a wire rack, or the centers might collapse
 Save to Pinterest
 My neighbor knocked on my door the day I first perfected these, following the scent of vanilla and butter through the hallway. She ended up staying for tea and we ate three each while she told me about her grandmother's thumbprint cookies—the ones she'd been trying to recreate for years without success. Sometimes the best recipes are the ones that connect us to something bigger than just ingredients and measurements.
Filling Variations That Work
I've discovered that white chocolate ganache—just melted white chocolate with a splash of cream—creates this incredibly decadent filling that pairs beautifully with the cocoa in the cookie. One rainy afternoon I tried adding lemon zest to the cream cheese filling, and that bright, tangy contrast completely changed the game. Don't be afraid to experiment with what you love.
Storage Secrets
These need to stay refrigerated because of that cream cheese filling, but I'll tell you something—I actually prefer them cold. The texture becomes more fudge-like and the flavors seem to deepen after a night in the fridge. Just bring them to room temperature for about 15 minutes before serving if you want that softer cookie texture.
Make-Ahead Magic
You can roll and refrigerate the dough balls for up to 2 days before baking, which is a lifesaver during the holidays. I've also frozen the baked cookies—filled and everything—for up to a month, and they thaw beautifully. Just layer them between parchment paper in an airtight container so they don't stick together.
- Press thumbprints into frozen dough balls before baking—they hold their shape even better
- If you're taking these somewhere, pack them flat because the centers can get messy in transit
- A light dusting of powdered sugar right before serving makes them look bakery-fresh
 Save to Pinterest
 There's something uniquely satisfying about thumbprint cookies—maybe it's that little well of filling, maybe it's how they fit perfectly in your palm. Whatever it is, I hope these bring as much joy to your kitchen as they've brought to mine.
Frequently asked questions about this recipe
- → Can I use white chocolate instead of cream cheese filling?
-
Yes, white chocolate ganache makes an excellent alternative filling. Simply melt white chocolate with a small amount of heavy cream to create a smooth, pourable consistency that sets beautifully in the thumbprint centers.
- → How should I store these cookies?
-
Keep these cookies in an airtight container in the refrigerator for up to 4 days. The cream cheese filling requires cool storage to maintain freshness and prevent spoilage.
- → Can I freeze the cookie dough?
-
Yes, roll the dough into balls and freeze them on a baking sheet before transferring to a freezer bag. When ready to bake, let them thaw slightly, press the indentations, add filling, and bake as directed.
- → What causes the cookies to spread too much?
-
Overly warm dough or insufficient flour can cause excessive spreading. Chill the dough for 15-20 minutes before baking if your kitchen is warm, and ensure you measure flour accurately using the spoon-and-level method.
- → Can I reduce the food coloring amount?
-
While you can use less coloring, the vibrant red hue is characteristic of red velvet. For natural alternatives, try beet juice powder, though it may alter the flavor slightly and result in a more muted tone.
