 Save to Pinterest
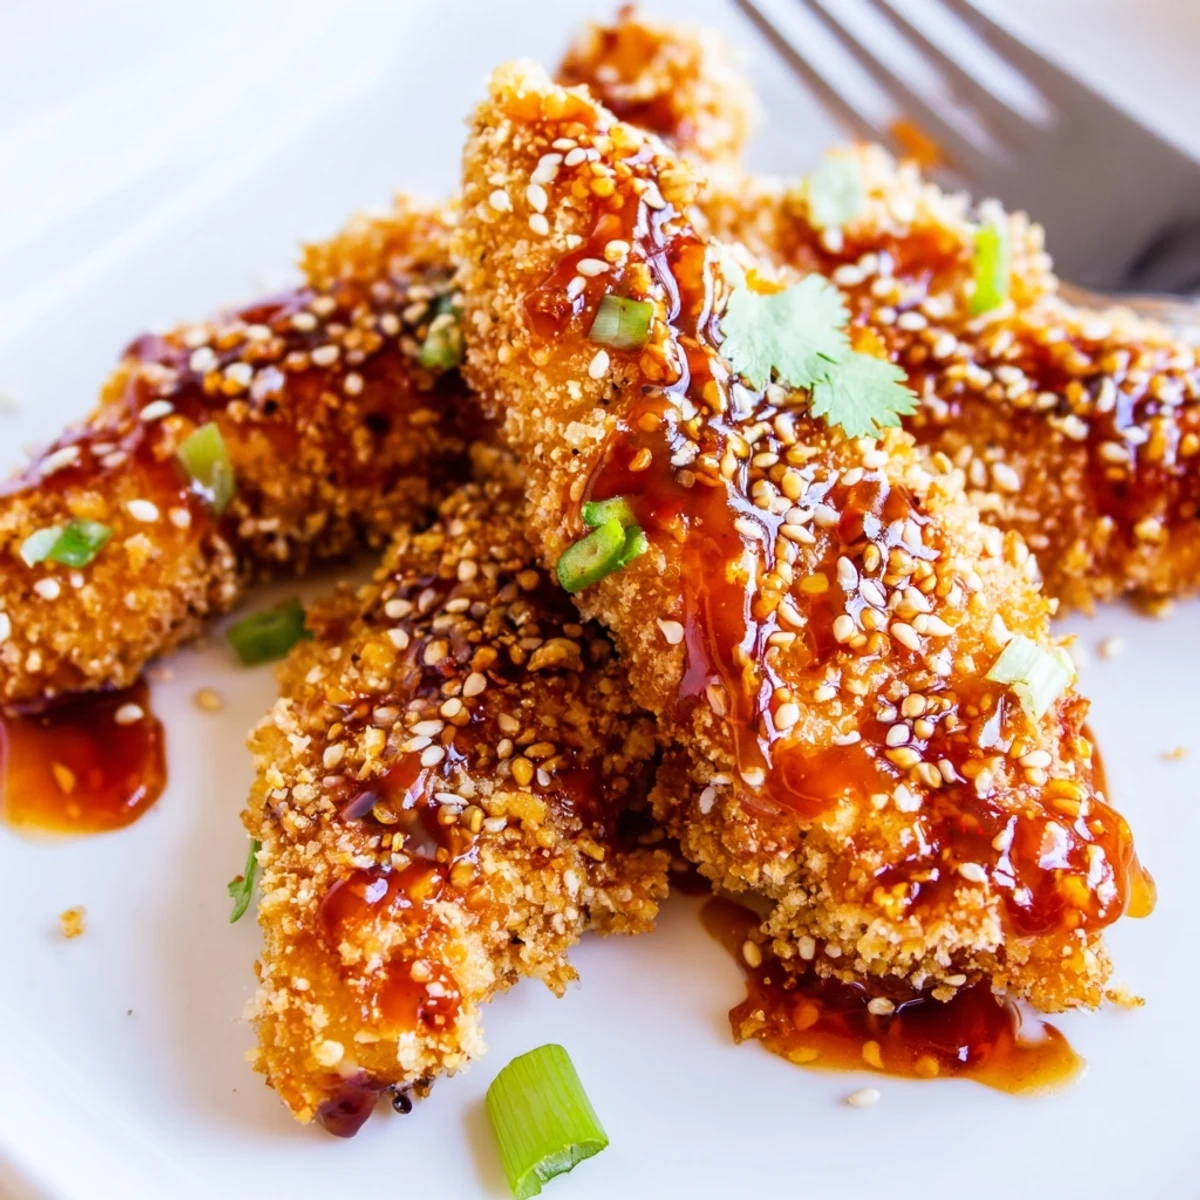
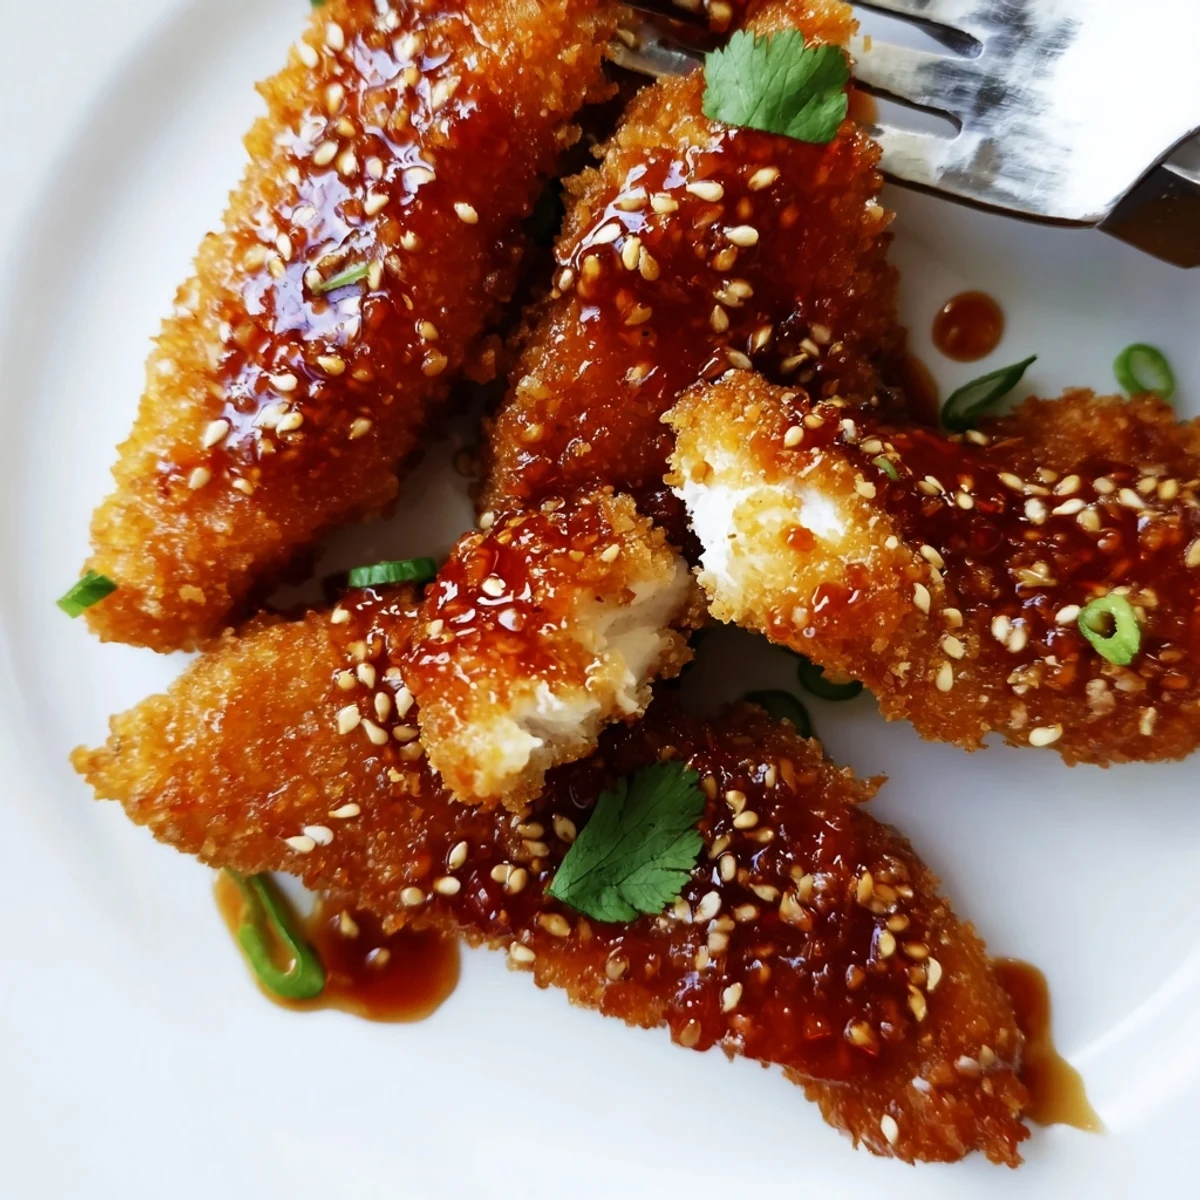
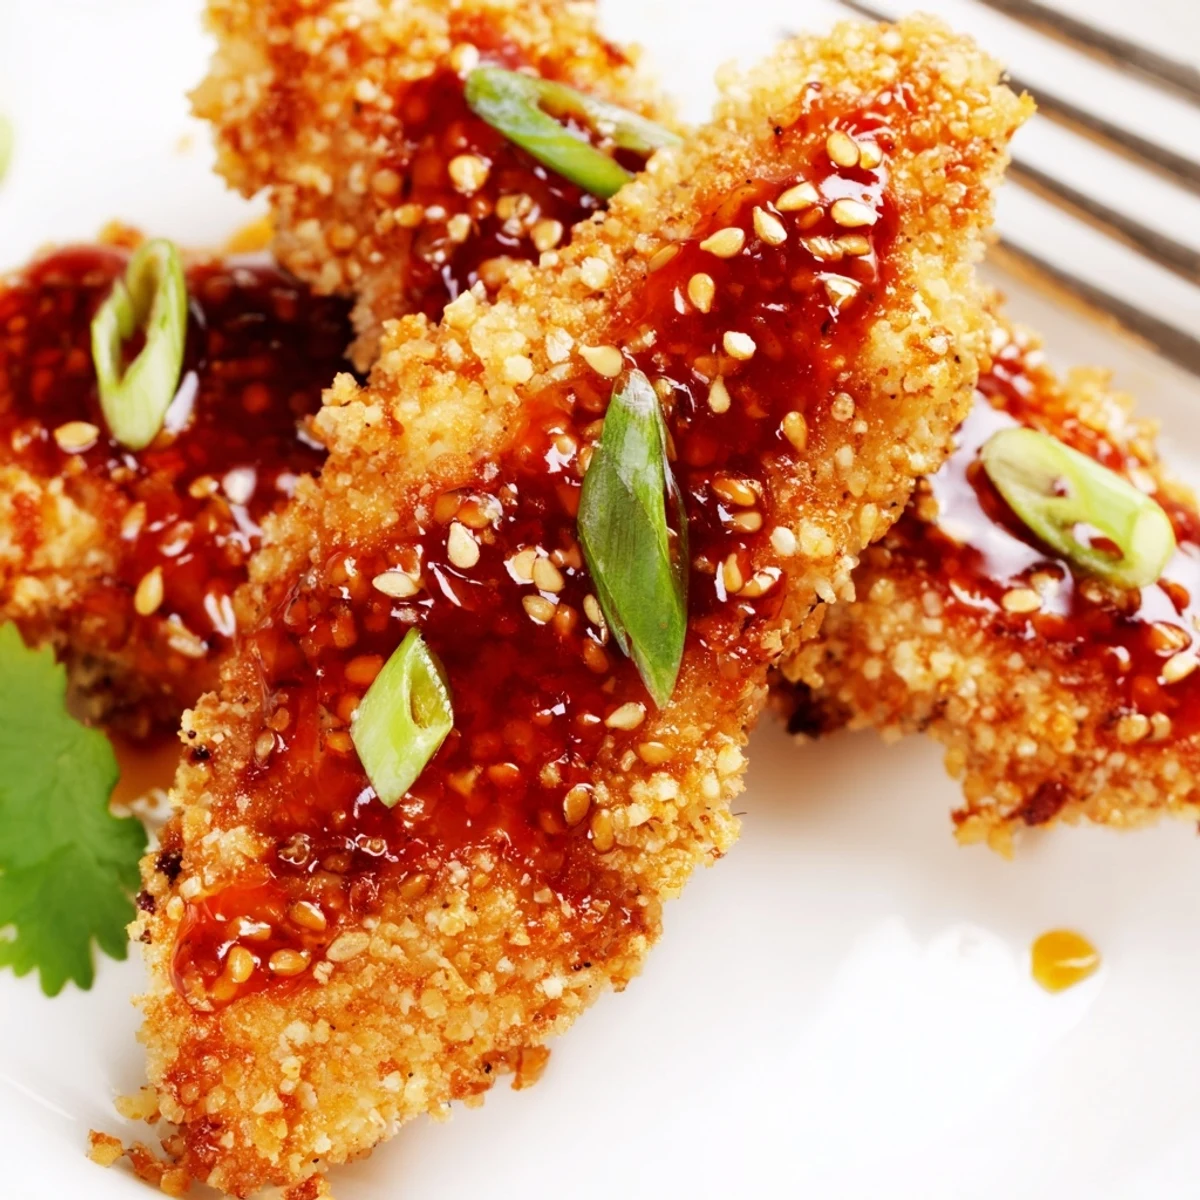
 These Thai-inspired chicken fingers feature a crispy panko coating paired with a glossy sweet and spicy glaze. The chicken strips are dredged in flour, dipped in egg, and coated with seasoned breadcrumbs before baking until golden.
The sticky sauce combines sweet chili, soy sauce, honey, and aromatic ginger and garlic, creating a perfect balance of flavors. Toss the freshly baked chicken in the warm sauce just before serving for maximum adherence.
Ready in 45 minutes, these make an excellent appetizer for gatherings or game day. Serve garnished with toasted sesame seeds, fresh spring onions, and cilantro alongside jasmine rice or vegetable sticks.
The smell of sweet chili sauce simmering on the stove still reminds me of that rainy Tuesday when my roommate and I decided to turn a boring dinner into something extraordinary. We'd been craving takeout but our budget had other plans, so we started experimenting with whatever we had in the pantry. The kitchen ended up covered in flour, but those first crispy, sticky bites made the mess absolutely worth it. Now it's the one appetizer that disappears faster than I can get them onto a serving platter.
I brought these to a friend's game night last winter, and honestly, I should have made double the batch. Within ten minutes of walking through the door, the platter was empty and people were actually asking for the recipe instead of just politely complimenting them. One friend confessed she'd been picking at the leftover sauce in the serving bowl with a spoon when no one was looking. That's when I knew this wasn't just another appetizer recipe it was a keeper.
Ingredients
- 500 g boneless chicken tenders: Tenders stay juicier than breasts, but if you're using breasts, slice them against the grain for the most tender bite
- Salt and black pepper: Don't skip this simple seasoning step it's the foundation that makes every other flavor pop
- All-purpose flour: Creates the essential first layer that helps the egg and breadcrumbs actually stick to the chicken
- 2 large eggs: Room temperature eggs work better as the sticky bridge between flour and coating
- Panko breadcrumbs: These Japanese-style crumbs create that shatteringly crispy crust we're all after
- Garlic powder and smoked paprika: This duo infuses the coating with savory depth and a subtle smoky warmth
- Sweet chili sauce: The backbone of our glade look for one with good chili flecks for authentic flavor
- Soy sauce: Adds that essential umami richness and balances the sweetness
- Honey and rice vinegar: Together they create that perfect sweet-tangy balance that keeps you coming back for more
- Sriracha: Totally optional if you're heat-sensitive, but that extra kick transforms good into unforgettable
- Fresh ginger and garlic: Fresh aromatics make a huge difference here, so please don't use the powdered stuff
- Sesame seeds and spring onions: These aren't just garnish they add texture and fresh brightness that cuts through the sweet glaze
Instructions
- Get your oven ready:
- Preheat to 220°C and line your baking tray with parchment paper for easy cleanup and to prevent sticking
- Season the chicken:
- Sprinkle salt and pepper over both sides of the strips, giving them a gentle massage to help the seasoning adhere
- Set up your coating station:
- Arrange three shallow bowls in order flour first, then beaten eggs, then panko mixed with garlic powder and smoked paprika
- Coat each strip:
- Dredge in flour, shaking off excess, dip in egg, then press firmly into the panko mixture until thoroughly coated
- Arrange and prep for baking:
- Place coated strips on the prepared tray and lightly spray with oil for that golden, restaurant-style finish
- Bake to perfection:
- Cook for 20 to 25 minutes, flipping halfway through, until they're deeply golden and crisp on all sides
- Simmer the sauce:
- Combine all sauce ingredients in a small saucepan and let them bubble gently for 2 to 3 minutes until slightly thickened
- Bring it all together:
- Toss the hot chicken fingers in the warm sauce until each piece is beautifully glazed, then top with sesame seeds and spring onions
 Save to Pinterest
 My partner, who usually claims to not like 'fancy' appetizers, ate three of these straight off the cooling rack before I could even get them plated. There's something about the combination of textures that satisfying crunch giving way to tender chicken, all wrapped in that sticky, finger-licking glaze that makes them completely irresistible. These have become our go-to for everything from casual weeknight dinners to impromptu gatherings with friends.
Make Ahead Like A Pro
You can bread the chicken strips up to six hours ahead and store them on a parchment-lined tray in the refrigerator. When you're ready to cook, they go straight from fridge to oven just add an extra minute or two to the baking time. The sauce can be made a day ahead and gently reheated while the chicken bakes.
Getting The Perfect Crisp
I learned the hard way that pressing the panko firmly onto the chicken makes a huge difference. Don't just lightly coat it really press those crumbs into the egg layer. Also, that final spray of oil might seem unnecessary, but it's what transforms the breadcrumbs from merely crispy to golden and beautifully bronzed.
Serving Ideas That Work
These chicken fingers play beautifully with so many sides and flavors. I love serving them with steamed jasmine rice and quick-pickled cucumber slices for a complete meal that feels restaurant-quality. For parties, toothpicks make them easy to grab and go.
- Extra lime wedges on the side add a bright acidity that cuts through the sweetness
- A dollop of cool sour cream or Greek yogurt balances the heat perfectly
- Crisp lettuce cups make for a fresh, low-carb serving alternative
 Save to Pinterest
 Every time I make these, I'm reminded that the best recipes often come from those moments of kitchen improvisation when you work with what you have and discover something better than what you planned.
Frequently asked questions about this recipe
- → Can I make these chicken fingers ahead of time?
-
Prepare the chicken strips and coat them up to 4 hours before baking. Store covered in the refrigerator. The sauce can also be made ahead and gently reheated when ready to serve. Toss the baked chicken in warm sauce just before serving for best texture.
- → What's the best way to reheat leftovers?
-
Reheat in a 180°C (350°F) oven for 10-12 minutes until heated through and crispy. Avoid microwaving as the coating will become soggy. Alternatively, air fry at 180°C for 5-6 minutes for optimal crispiness.
- → Can I deep-fry instead of bake?
-
Yes, deep-fry in oil heated to 180°C (350°F) for 3-4 minutes until golden brown and cooked through. Drain on paper towels before tossing with the sticky sauce. This method yields extra crispy results.
- → How can I adjust the spice level?
-
Reduce or omit the sriracha in the sauce for milder flavor. For more heat, add additional sriracha or red pepper flakes. The sweet chili sauce provides mild warmth, so these remain family-friendly as written.
- → What other proteins work with this sauce?
-
The sticky Thai sauce pairs beautifully with shrimp, salmon fillets, or meatballs. For a vegetarian version, use pressed tofu cubes or cauliflower florets. Adjust cooking time accordingly for your chosen protein.
- → Can I freeze uncooked chicken fingers?
-
Yes, freeze breaded raw chicken strips in a single layer on a baking sheet until firm, then transfer to a freezer bag. Bake from frozen at 200°C for 25-30 minutes, adding a few extra minutes as needed.
