 Save to Pinterest
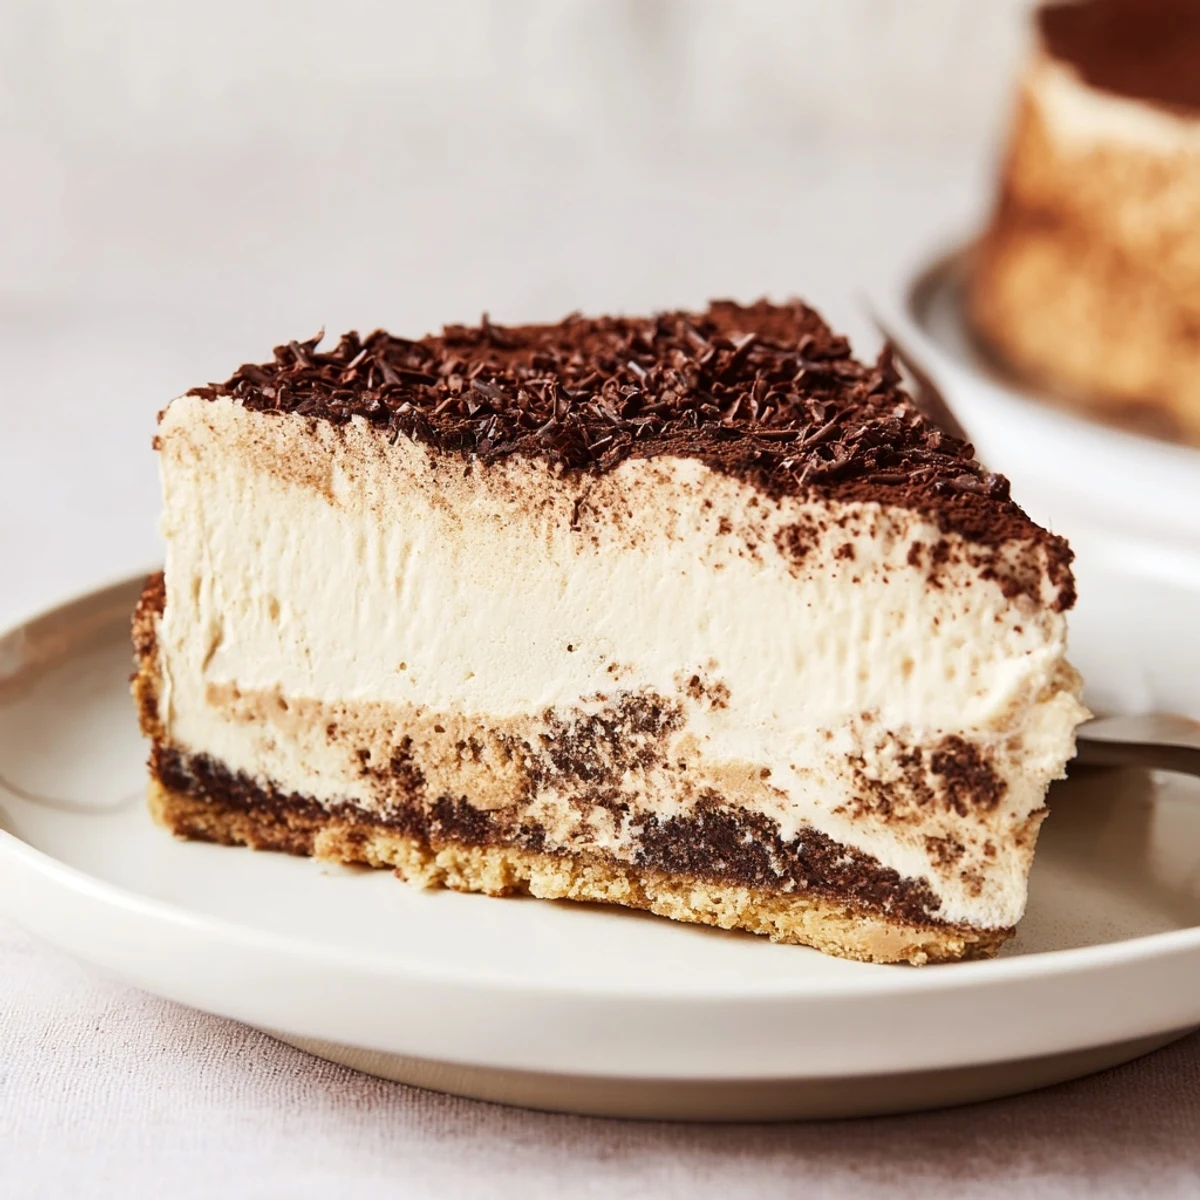
 This indulgent coffee‑infused tiramisu cheesecake combines a crisp espresso‑kissed cookie crust with a velvety cream cheese and mascarpone filling flavored by strong brewed espresso and vanilla. The crust is lightly soaked with a sweet coffee mix before adding the filling and baking in a water bath until the center just sets. Cooling slowly and chilling for several hours ensures a smooth, creamy texture; finish with whipped cream, a generous cocoa dusting and chocolate shavings for contrast. Tip: bring dairy to room temperature and avoid overbeating to prevent cracks.
The first time I made this tiramisu cheesecake, my kitchen filled with the scent of freshly brewed espresso and melting chocolate. As I measured out each ingredient, I couldn't help but sneak a fingerful of the mascarpone—it's just too tempting! Mixing silky cream cheese with bold coffee and a crunchy ladyfinger base, I found myself grinning at how the textures promised indulgence in every bite.
I remember serving this for a late spring birthday, when everyone lingered at the table swapping stories long past dessert. Someone's fork clattered onto their plate as their eyes widened at the first taste—it's the only time I've seen total silence from a very talkative bunch.
Ingredients
- Ladyfinger biscuits (savoiardi): Their brittle texture finely crumbles into a base that soaks up espresso without going soggy—use a food processor for uniform crumbs.
- Unsalted butter: Melted butter acts as the perfect glue for the crust; cool it slightly to avoid greasy pockets.
- Instant espresso powder: Intensifies the coffee note in the base—whisk well so it dissolves evenly into the crumbs.
- Cream cheese: Bring it to room temperature beforehand for velvet-smooth blending and zero lumps.
- Mascarpone cheese: Essential for that classic tiramisu tang; frostier than cream cheese, so handle gently.
- Granulated sugar: Keeps the filling balanced, but don’t overpack your measuring cup or it can throw off the texture.
- Eggs: Large eggs help bind the cheesecake—add them one at a time for the creamiest mix.
- Strong brewed espresso: Cool it well so it doesn’t curdle your filling—taste before using to ensure it's bold but smooth.
- Vanilla extract: Adds hidden warmth; the tiniest splash makes the flavors sing.
- All-purpose flour: Just enough to help stabilize the batter, especially important if your mascarpone is extra creamy.
- Salt: The little pinch that makes the sweet, creamy, and coffee notes pop.
- Coffee liqueur: Optional, but a game changer for adults—choose a brand with deep, chocolatey notes.
- Heavy cream: Chill the bowl and beaters first for the fluffiest topping—patience pays off.
- Powdered sugar: Dissolves quickly into whipped cream to avoid a gritty finish.
- Unsweetened cocoa powder: A generous dusting transforms the look and deepens the classic tiramisu vibe.
- Dark chocolate shavings: Optional but dramatic—use a veggie peeler on a chocolate bar for wide curls.
Instructions
- Prep the Pan:
- Grease and line your springform pan, making sure the base fits snugly—this step saves you from a leaky disaster later.
- Create the Crust:
- Pulse ladyfingers into sand-like crumbs, blend with butter and espresso powder, and press the mix tightly into the pan—when your palm is slightly warm, it helps the crust stay compact.
- Quick Bake:
- Bake the crust for ten minutes, just until fragrant and golden at the edges.
- Mix Coffee Soak:
- Combine hot espresso with sugar (and liqueur if using); whisk until dissolved, and inhale deeply—you'll know it's ready by the aroma alone.
- Blend Creamy Filling:
- Beat cream cheese, mascarpone, and sugar until utterly silky, then add eggs one by one, followed by espresso, vanilla, flour, and salt—don't overmix, or you'll risk cracks.
- Soak the Base:
- Gently brush or drizzle half the coffee soak over the cooled crust, letting it absorb the rich flavor without turning soggy.
- Pour the Cheesecake:
- Pour the filling over the base, tapping the pan gently to smooth and nudge out any sneaky bubbles lurking beneath the surface.
- Water Bath Bake:
- Set the pan in a water bath and bake just until the center jiggles when nudged—the aroma should make you giddy with anticipation.
- Cool Gently:
- Leave the cheesecake in the turned-off oven with the door cracked for an hour; this gentle slow-cool prevents sinking and cracks for the most stunning finish.
- Chill Completely:
- Allow to cool to room temperature, then refrigerate at least four hours—overnight if you can stand the wait—patience means clean slices later.
- Whip Up Topping:
- Whip cream with powdered sugar and vanilla until it holds stiff peaks; stop before it starts to look grainy for the dreamiest cloudlike cover.
- Decorate and Serve:
- Unmold the chilled cheesecake, drizzle remaining coffee soak, cover with whipped cream, dust with cocoa, and shower on chocolate shavings—serve chilled and let each forkful linger.
 Save to Pinterest
 There was one evening when we spontaneously served this in tiny espresso cups—everyone scooped out creamy spoonfuls, laughing at how grown-up tiramisu had suddenly turned playful. It's become a running joke that "cheesecake night" brings out our best improvisations.
Making Ahead Is Your Friend
This cheesecake is a gift to your future self: it tastes even better after resting overnight, letting the coffee and mascarpone deepen. On busy days, I split the steps—crust one evening, filling the next—and it always turns out stress free.
How to Avoid a Soggy Crust
Brush the crust rather than soak—too much liquid too fast will leave you with a base that's more pudding than biscuit. Letting it cool after baking also gives a sturdier foundation for the lush filling.
Simple But Stunning Garnishes
I once let my niece handle the cocoa dusting—it landed in little constellations that drew delighted giggles, not complaints. Chocolate shavings and extra espresso on top are a conversation starter every single time.
- A cooled cake is much easier to decorate—don’t rush it.
- Use a small, fine sieve for perfect cocoa powder clouds.
- Wipe your knife between cuts for flawless slices.
 Save to Pinterest
 Whether for a celebration or just because, this cheesecake always sparks a little joy with every forkful. I hope you get as many happy, sticky-fingered memories from it as we have.
Frequently asked questions about this recipe
- → How do I prevent cracks on the surface?
-
Bake the cake in a water bath, avoid overmixing the batter, and stop baking when the center still jiggles slightly. Let the oven cool with the door ajar and cool slowly before refrigerating to minimize cracking.
- → Can I skip the coffee liqueur?
-
Yes. Omit the liqueur and increase the espresso or use a splash of brewed coffee syrup for flavor. The soak and brewed espresso in the filling provide plenty of coffee character.
- → How strong should the espresso be?
-
Use a strong, concentrated brew so the coffee flavor carries through the dense filling and crust. Cool the espresso before adding to the dairy to keep the texture smooth.
- → What can I use instead of ladyfingers for the crust?
-
Crushed digestive biscuits or graham crackers make a sturdy, buttery base. Adjust the sugar and espresso powder to match the sweetness and intensity you prefer.
- → How long should it chill before serving?
-
Chill for at least 4 hours, though overnight refrigeration yields the best texture and cleaner slices. Serve well chilled for optimal structure and flavor balance.
- → Any tips for a silky filling?
-
Bring cream cheese and mascarpone to room temperature, beat until smooth, add eggs one at a time, and fold in brewed espresso gently. Avoid overbeating once flour is added to keep the filling creamy.
